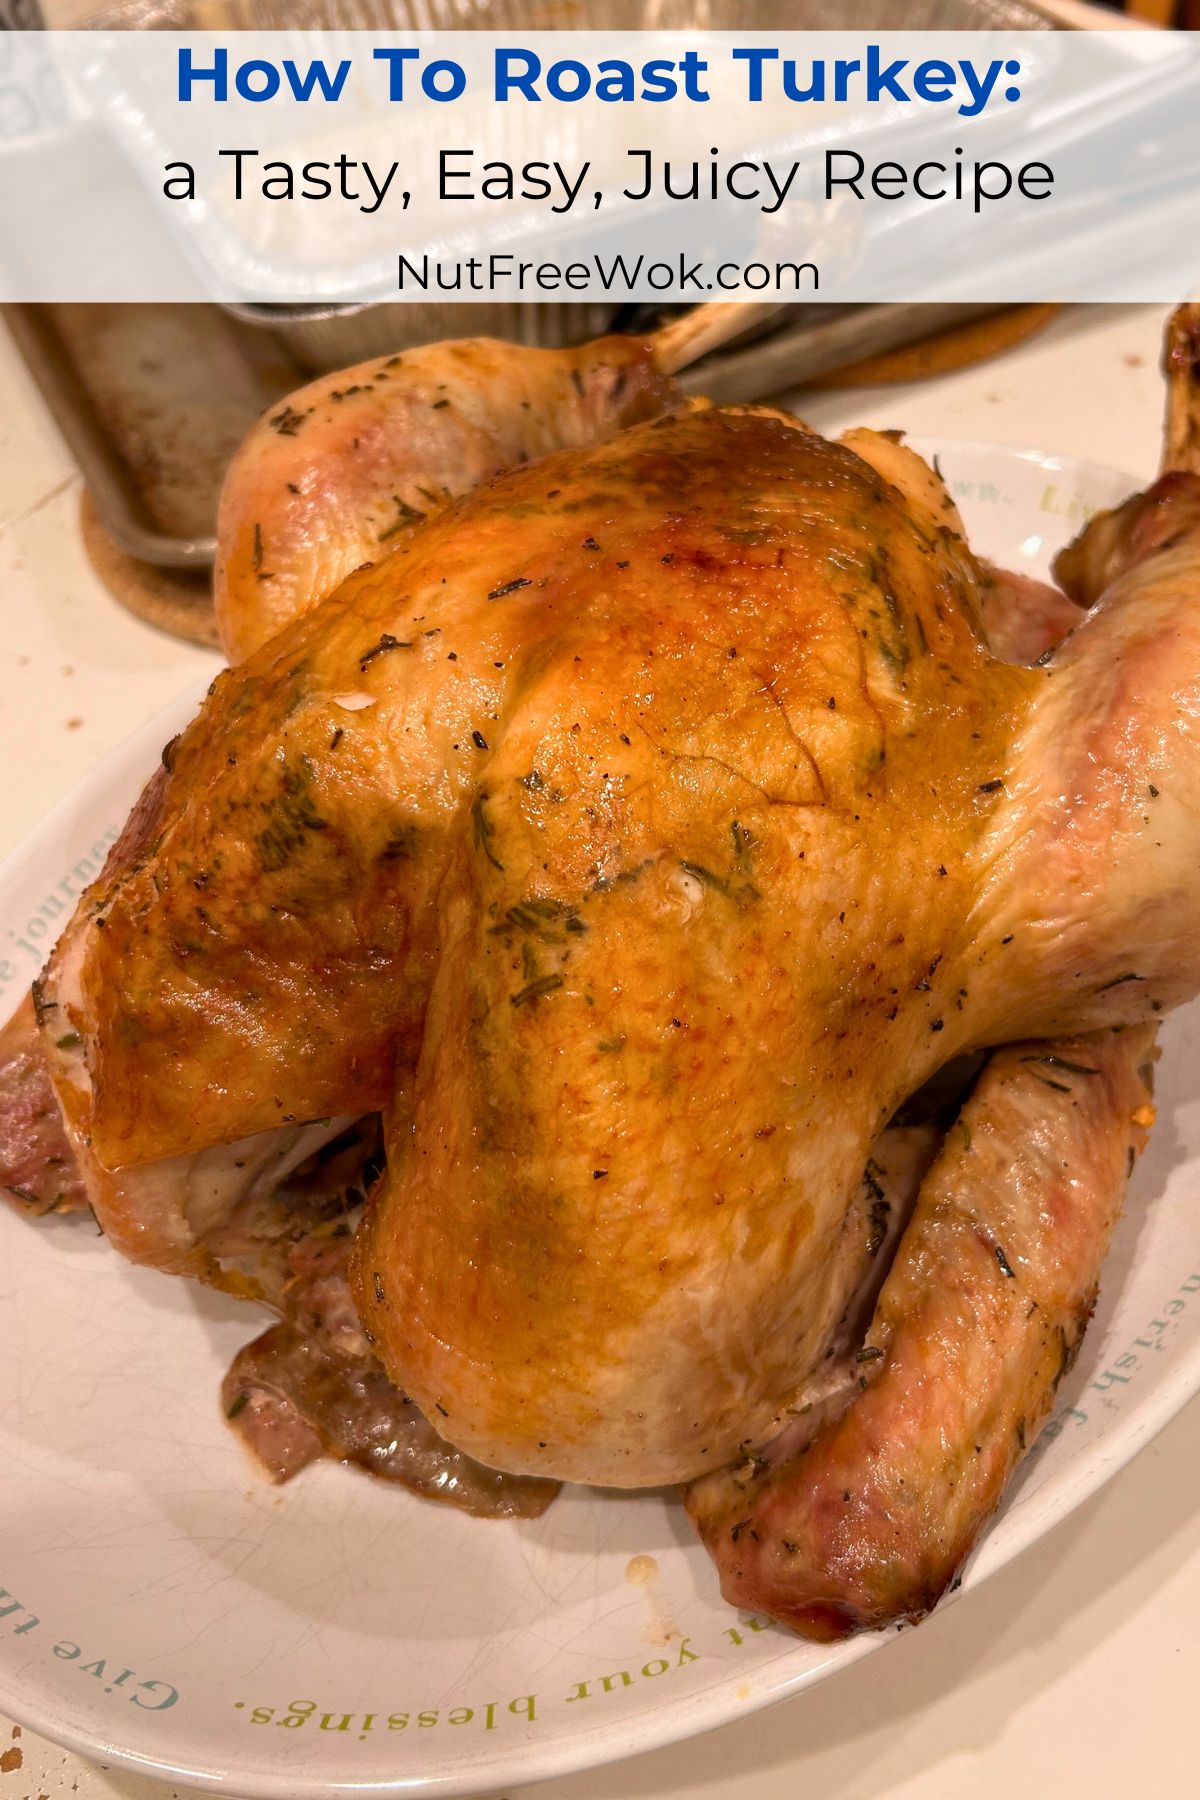
Make a perfect roast turkey that is tasty, evenly cooked, and juicy for Thanksgiving with an easy dry brine and 2-step roasting method. I made a simple rosemary-garlic dry brine to season the turkey and included a lot of tips to roast turkey that you may help you.
Disclaimer: Please check that all ingredients are suitable for your allergies and be sure to ask your medical care team regarding any allergy related questions (I do not share medical advice). As an Amazon Associate, I earn from qualifying purchases.
Jump to RecipeRoasting a Whole Turkey the Easy Way
I usually brine turkey drumsticks with a brining solution and then insert some celery sticks into the drumsticks for juicy, delicious results. But this year I was feeling under the weather before Thanksgiving and by the time I felt better, I was too busy to shop around for turkey drumsticks.
Instead, I bought an 11-pound whole turkey to roast, which happened to be pre-seasoned already with salt, sugar, and flavoring. Some of us need a low-sodium diet so I didn’t want to add a lot of salt or sugar to the dry brine since the turkey is already pre-seasoned.
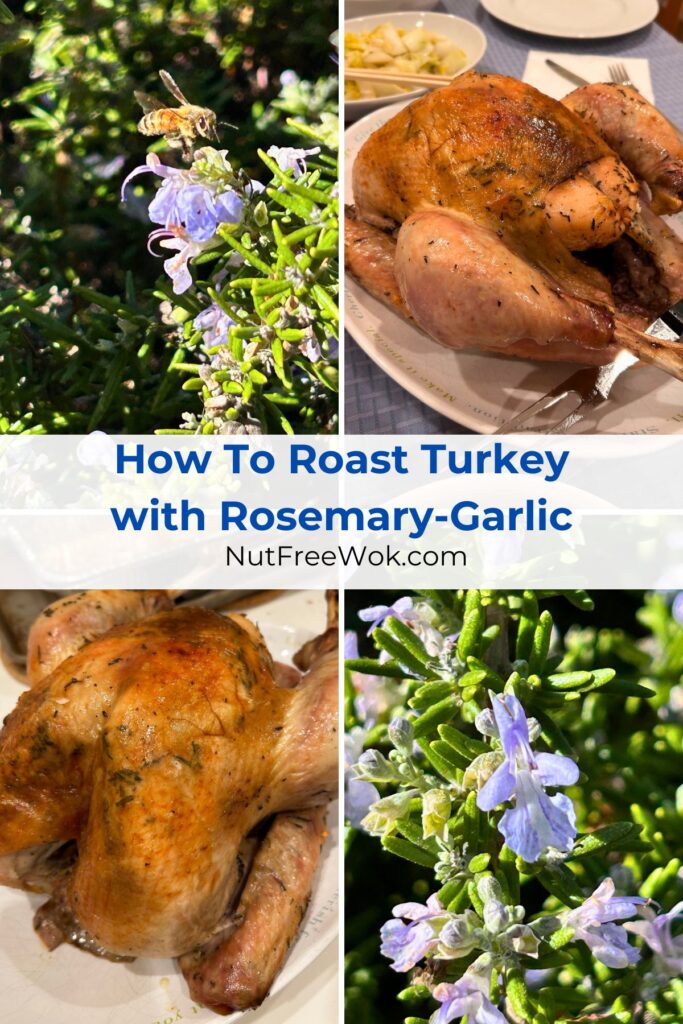
But I also didn’t want to roast a plain turkey. I decided to dry brine it with lots of garlic, rosemary, black pepper, and a small amount of salt and sugar. Adding rosemary and garlic to roasted meats is good for us because they have antioxidants.
6 Days before Thanksgiving: Start Thawing the Turkey
Allow time to defrost your turkey in your refrigerator. The usual advice is to allow 1 day for every 5 pounds of turkey. Even though I bought an 11-pound turkey on Saturday and let it defrost in the refrigerator until Tuesday, the turkey was still partially frozen even after 3 full days of thawing in the refrigerator.
If the turkey is still frozen, then submerge the wrapped turkey in a large stock pot filled with room temperature water for 15-30 minutes. You can brine a partially frozen turkey but you need it to be thawed enough so you can remove the giblets out of the turkey cavity.
Check that you have the equipment that you will need. I had to improvise because I forgot that I had tossed my old turkey baster and rusty roasting pan with a V-shape rack but didn’t replace them because I thought I would be making turkey drumsticks for every Thanksgiving forever. 😂 Also check that your oven mitts and meat thermometer are ready to use.
2 Days Before Thanksgiving: Prep and Dry Brine the Turkey
I like to prepare and season my turkey 2 days before cooking. It’s an easy task to get out of the way.
To make the rosemary-garlic dry brine, I combined salt, sugar, chopped rosemary from my garden, freshly minced garlic, and freshly ground black pepper. I use an OXO pepper grinder and 20 turns is approximately 1 teaspoon. Then I add a big splash of olive oil to make a paste and set aside while I prepare the turkey.
Note that I use sea salt in this recipe and reduced the salt since the 11 pound turkey was pre-brined. It worked out well, the turkey was flavorful and not too salty. It might have been bland if I roasted the pre-brined turkey without any additional seasoning.
- For a natural or organic turkey that is not pre-seasoned, I would double the sea salt and sugar to 4 teaspoons.
- If using kosher salt instead of regular salt, then add an extra 1/4 teaspoon of kosher salt for every teaspoon of salt in the recipe.
- In case you have a larger turkey, use 1/4 teaspoon of salt and sugar for every pound of turkey (multiply the weight of your turkey by .25 to calculate the total number of teaspoons).
Remember How Much Your Turkey Weighs
One important step to roasting a turkey is to know how much it weighs before putting it in the oven. Take a photo of the label or write the weight down somewhere before you throw away the turkey wrapper.
You need to know the weight to calculate the total cooking time, approximately 15 minutes per pound. Then you can estimate what time to start the roasting the turkey.
- Before you roast the turkey, you will need to take it out of the refrigerator for an hour to allow it to come to room temperature.
- If you have a 10-pound turkey, then it will take approximately 150 minutes to cook the turkey. Your turkey will likely be larger, multiple the weight with 15 to calculate the approximate amount of roasting time.
- And then after roasting the turkey, you need to let it rest for 20-30 minutes and allow about 20-30 minutes to carve the turkey.
- That’s adding up a minimum time of 4.5 hours from refrigerator to table for a 10-pound turkey. Allow more time since your turkey will most likely be larger.
Preparing the Turkey in a Food Safe Way
The USDA advises consumers not to wash turkeys and they share tips to prevent bacterial cross-contamination in our kitchens as well as food safety tips. But if people brine their turkey, then they will need to rinse their turkey to remove some of the excess salt before roasting. Be sure to clean your sink and prep area before and after handling your turkey and wash your hands.
If I see feathers, membranes, or anything that needs to be removed, I must clean the turkey. One way is to set aside a small bowl of salt (~1/4 cup) and rub the turkey skin and cavity with salt. And then you can either remove the excess salt with damp paper towels or carefully rinse the turkey and drain.
Additional turkey prep tips:
- Use kitchen scissors to remove the tail and set aside along with the neck, heart, and gizzard to make a turkey stock. I use kitchen scissors that come apart because they are easy to sanitize in a dishwasher.
- If there are hock locks on the legs, remove them. The turkey will cook more evenly if the turkey legs are not tied together.
- Discard the pop-up thermometer if there’s one in the turkey. The pop-up thermometers might not pop up reliably and results may vary. Plan on using a digital meat thermometer for precision.
- Loosen the skin from the turkey and rub the brine in between the skin and the breast, inside the cavity, and everywhere on the skin. Tuck the wing tip behind the turkey.
- Then place the turkey into a 9×13 casserole dish or larger container with walls to prevent spillage of the turkey juice and wrap with plastic to refrigerate. If you have a brining bag, you can use that instead.
Thanksgiving Day: Roast Turkey Tips
Before the turkey goes into the oven:
Take your turkey out of the refrigerator before it’s time to roast the turkey, allow it to come to room temperature for about an hour. Since this turkey is already pre-seasoned with salt, my dry brine is mostly garlic and rosemary with a little bit of salt and sugar. I do not rinse the turkey but I do pat dry. Transfer the turkey to a roasting pan and check that the wing tips are still tucked behind the turkey.
Prep tips for an evenly cooked turkey:
Whenever I roast a whole turkey, it’s always a challenge to cook it evenly. It seems that the breast takes longer to cook, and the drumstick will cook faster than the thigh. Not tying up the drumsticks and not filling the cavity with stuffing or aromatics will help the breast to cook faster
Wrap the turkey drumsticks and wings with pieces of parchment paper and foil for juicy drumsticks and wings. The parchment paper prevents the foil from sticking to turkey and acts as extra insulation. The foil holds the parchment paper in place. Remove them during the last hour of roasting for even browning and reuse the foil to cover the breast loosely to keep the breast from browning further.
Roasting safety tips
If your roasting pan needs support, place the pan on a rimmed baking sheet. I forgot that I had tossed my old roasting pan with a V-shaped rack because it was scratched and rusty, so I had to use an aluminum disposable pan which needed support.
Check that the oven rack is at the lowest position before you start preheating the oven.
Gather the equipment that you will need such as oven mitts, meat thermometer, turkey baster, etc. and give the thermometer and turkey baster a quick wash.
After the turkey goes into the oven:
I like to roast my turkey at a higher temperature, 425°F, for about 30 minutes and then without opening the oven, lower it to 325°F. This allows the turkey to brown a little bit and cook evenly over a shorter amount of time.
I forgot I had thrown out my old turkey baster with a rubber bulb and plastic cylinder. I had to improvise and used a fork as a handle to rub half a stick of butter over the hot turkey. The butter melts right onto the turkey to baste it. I keep a small prep bowl nearby as a landing spot for the butter. There is no need to melt the butter, and cleanup is easy. Worked great for me and whatever butter was left, I used it to make gravy.
Keep Track of Time!
Immediately after you put the turkey in the oven, write down the time you put the turkey in the oven immediately and set a timer for 30 minutes as a reminder to lower the temperature.
I plan a timeline for an 11 to 12-pound turkey that might look like the one below. Multiply 15 (minutes/pound) by the weight of your turkey (pounds) to estimate how long it will take to bake the turkey.
I do not like overcooked turkey so I also multiply 13 (minutes/pound) by the weight to have an estimate of minimum time to roast the turkey and that’s a good time to stick a thermometer into the turkey to check if it’s done.
Here’s an example of my cooking timeline for roasting an 11 pound turkey. Start earlier to allow more time if your turkey is larger, if you plan to open and close your oven to bake other foods at the same time, if you want to eat earlier than 6:30 pm, etc..
- 2:00 pm – Take the brined turkey out of the refrigerator, prepare pan, check oven rack position
- 2:30 pm – Start preheating the oven to 425°F
- 3:00 pm – Put the turkey in the oven at 425°F
- 3:30 pm – Lower oven temperature to 325°F
- 4:00 pm – Baste with butter on a fork
- 4:30 pm – Baste, unwrap the drumsticks, use the foil to cover the breast, and baste the drumsticks.
- 5:15 pm – Baste (if out of butter, use a turkey baster to baste with drippings) and approximately 30 minutes before your estimated time to finish cooking your turkey, check the turkey temperature to estimate when to check again.
- ~5:45 pm – Take turkey out, it’s done when the breast is between 160°F to 165°F. Tent with foil and let the turkey rest. Bake or reheat other dishes in the oven
- 6:10 pm – Make gravy, carve turkey (or carve at the table), finish cooking side dishes (delegate!)
- 6:30 pm – Serve dinner
You can also baste every 45 minutes if you’re busy. Your turkey might cook a little bit faster if you only open your oven to baste every 45 minutes. You might want to check the temperature a little bit earlier than estimated.
How Did It Turn Out and Leftovers
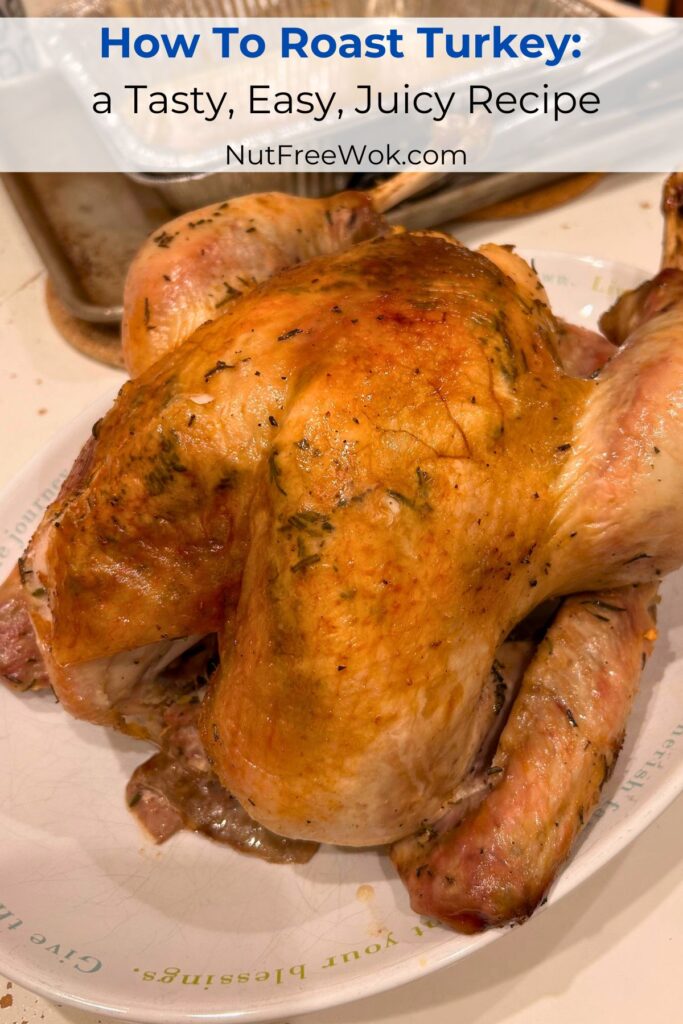
My family loved it! The turkey looked appealing because it wasn’t burnt or looked overcooked. But the roast turkey was also cooked through thorougly and juicy at the same time.
The seasoning was spot on, flavorful but not too salty. The rosemary, garlic, and black pepper were subtle even though I was concerned I added too much.
The four of us ate all the dark meat (as expected) and half of the turkey breast (a surprise) in one sitting. Over the next few days, we finished the turkey with the Thanksgiving sides I made, in cheesy quesadillas, and as topping for turkey jook.
I think the 11-pound turkey was just right for us and relatively easy to cook. If we had more people join us for dinner, I might select a 12-13 pound turkey and cook more sides and/or a second main dish.
One of the reasons I like to roast a whole turkey is that I love to make turkey rice porridge (aka turkey jook or for gay jook in Cantonese). I try my best to pick out the bones but inevitably I will miss some of the tiny bones, so always eat small spoonfuls and check for bones. It’s a light, comforting meal and I top it with shredded pieces of cooked turkey, cooked veggies, and maybe a fried egg.
Allergy Aware Roast Turkey
This recipe is free of peanuts, tree nuts, eggs, soy, fish, shellfish, wheat, and sesame as written.
The main allergen is milk in the butter. You can baste with olive oil, which would be allergen free. Other options to consider are dairy-free butter or mayonnaise that don’t contain other allergens you avoid.
Otherwise, try adding 2 cups of broth in the pan which helps to keep the turkey moist and you can use a turkey baster to baste the turkey with the drippings in the pan.
I recommend using a turkey baster with a stainless steel cylinder and a silicone bulb because of concerns about the risk of toxic contamination in kitchen utensils made with certain types of plastic.
I have also skipped basting altogether which works great. If you skip basting and do not open the oven door as the turkey roasts, check the temperature earlier an hour earlier than estimated.
How To Roast Turkey: a Tasty, Easy, Juicy Recipe
Ingredients
- 2 tablespoons garlic chopped
- 2 tablespoons rosemary fresh (or 1 tablespoon rosemary, dry)
- 1 tablespoon black pepper freshly ground
- 2 teaspoons salt
- 2 teaspoons sugar
- 1/4 cup olive oil
- 1 10-12 pound turkey
- salt approximately 1/4 cup for cleaning the turkey
- 1/4 cup butter unsalted
Instructions
- In a small bowl, combine the garlic, rosemary, black pepper, salt, sugar, and olive oil and set aside.
- Note the weight of the turkey and then remove all the packaging, the plastic pop-up thermometer, and the hock lock (plastic device that holds the legs together).
- Remove the giblets from inside the turkey. Use kitchen scissors to remove the tail. Set aside for making turkey stock later.
- Use damp paper towels to rub salt in areas with excess membranes or small feathers (check under the wings and around the legs). Use additional damp paper towels to wipe off any excess salt or carefully rinse as needed.
- Use your fingers to loosen the skin from the breast area and rub approximately 1/4 of the rosemary mixture on the breast. Rub the rest of the mixture all over the turkey and inside the cavity as well. Tuck the wing tips behind the turkey. Transfer to a large, sturdy, leakproof container and wrap with plastic wrap securely or use a brining bag. Refrigerate for 1-2 days, until ready to roast.
- Approximately 5-6 hours before eating, take the turkey out of the refrigerator and allow it to come to room temperature for an hour. Prepare the roasting pan, check that the wing tips are still tucked, wrap the drumsticks and wings with parchment paper and foil. Check that the oven rack is at the lowest position and that there is enough clearance to fit the turkey. Preheat the oven to 425°F.
- When the oven is ready, place the roasting pan into the oven at the lowest position and roast at 425°F for 30 minutes.
- After 30 minutes, change the oven temperature to 325°F. Do not open the oven door for the first hour of roasting.
- After one hour of roasting, baste the turkey with butter. Either melt the butter and use a silicone brush or poke half a stick of butter with a fork and rub the turkey with the butter. Baste every 30 minutes with the remaining butter and/or use a turkey baster to baste with the drippings from the roasting pan.
- Approximately one hour before the turkey is ready, unwrap the drumstick and use the foil to cover the turkey breast. Baste the drumstick.
- During the last 30 minutes of roasting (based on 15 minutes x weight of turkey), use a digital thermometer to check the turkey temperature through the thickest part of the breast but without the probe touching the bone.
- If the temperature is around 140°F, maybe check again in 20-30 minutes. If it's around 150°F maybe check again in 5-10 minutes. If it's around 160°F, it's close to being ready when the temperature reaches 165°F within minutes.
- To double check, move the probe to check the deepest, thickest part of the thigh without touching the bone. It's fine to tent if the temperature at the thigh is 175°F.*
- Take the turkey out of the oven and cover the turkey with a large piece of foil over it. Allow the turkey to rest for 20-30 minutes before carving and serving while still warm.
Notes
Related Recipes
Our family enjoys a mixture of traditional recipes as well as some Asian inspired recipes for Thanksgiving. Pick one or two of these recipes to try throughout the year or at your next holiday meal.
Juicy Roasted Turkey Drumsticks, Easy Nut Free Recipe – we really like dark meat. There have been years when I make a dozen turkey drumsticks for everyone.
Instant Pot Cranberry Sauce, An Easy 3 Ingredient Recipe – this recipe comes together very quickly in the Instant Pot. I make it the day before, so tart and delicious.
Dairy-Free & Make Ahead Beef Gravy Recipe – instead of using beef broth, use turkey stock.
Sharon’s Special Sticky Rice Recipe – one of my favorite dishes for Thanksgiving and all special occasions.
Instant Pot Okinawan Sweet Potatoes, Two Ways – these purple Okinawan sweet potatoes are so delicious if you want to try a different variety of sweet potatoes.
Easy & Low-Fat Chinese Green Beans with Turkey Bacon Recipe – this is an oven-roasted variation of a Chinese string bean dish that is typically deep fried!
Pumpkin Mochi Muffins, a Top 9 Allergen Free Dessert Recipe – it’s a variation of butter mochi
Super Cranberry Orange Muffins, Dairy & Nut Free – if you love fresh cranberries, buy an extra bag to make these muffins. They freeze well and taste freshly baked if you heat them up in an air fryer.
Thanks for reading, please help Nut Free Wok!
If you like this post or recipe, please be sure to give a 5 star rating, leave a comment, and share this post! Your support means a lot to me.
Subscribe to Nut Free Wok’s email subscription (be sure to respond to the confirmation email). You will be notified by email next time I publish another post or recipe and I won’t send you spam or share your email address with anyone.
Disclosure/Disclaimer:
I may mention the names of stores and/or brand names of products that I use because readers ask and I share products and sources which I use and think may be helpful to readers, all opinions are my own. Please note that manufacturing practices and ingredients can change at anytime without notice and readers are always responsible for assuring allergen safety before buying or consuming foods. NutFreeWok.com is a participant in the Amazon Services LLC Associates Program, an affiliate advertising program designed to provide a means for sites to earn advertising fees by advertising and linking to Amazon.com. Thank you for reading!
