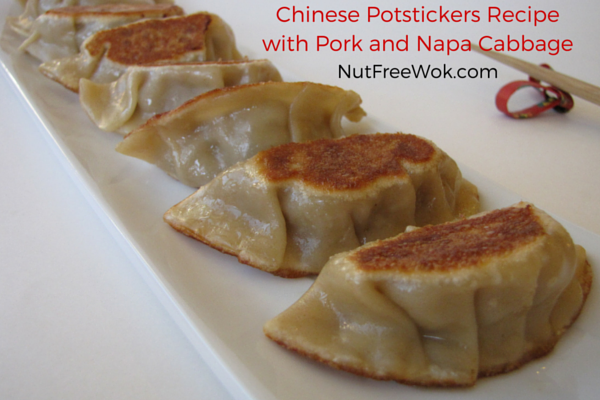
Chinese Potstickers are also called Jiaozi or Guotie in Chinese. This is a traditional recipe using store bought potsticker wrappers and a basic filling of pork and napa cabbage. Our family loves potstickers and I have plans to share additional variations with you later but let’s start with one super easy recipe.
Disclaimer: Please check that all ingredients are suitable for your allergies and be sure to ask your medical care team regarding any allergy related questions (I do not share medical advice). As an Amazon Associate, I earn from qualifying purchases.
Jump to RecipeBig Family, Big Recipes, Lots of Fun Family Time
My mom grew up in a household with 11 siblings as well as my grandfather’s employees and making meals was always a huge production and large scaled. Even when she cooked for our immediate family of three, she and I would spend an entire Sunday afternoon making hundreds of dumplings or wontons. My mom was a savvy working mother and she set aside some of them to freeze for later.
While it was fun for me to hang out with my mom, I associated making dim sum as a huge production that required hours to make. It took me awhile to realize that it’s okay to make a small batch. I scaled down the recipe and tried it with my 12 year old son. We worked together and it took us about 10 minutes to make the filling, 10 minutes to assemble the potstickers, and 10 minutes to fry them while I cleaned up. 30 minutes of hands on time to make hot, savory, and crispy skinned potstickers sounds good, doesn’t it?
Assemble Potstickers Like a Pro
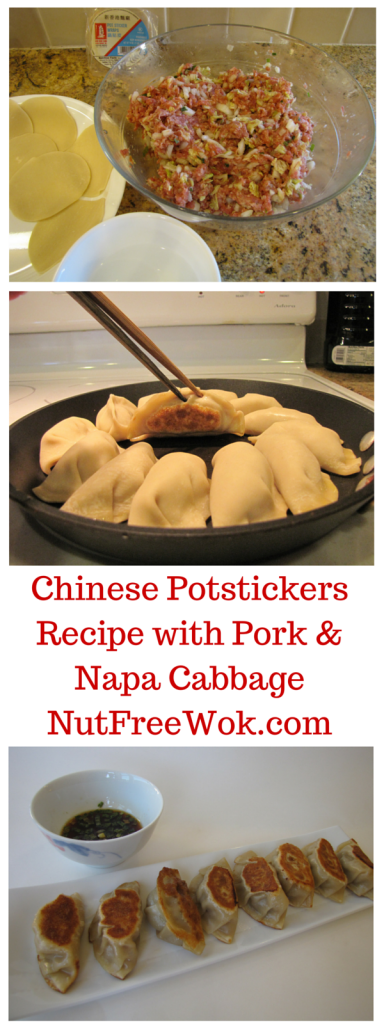
You will need a clean dry surface to work on, a small bowl of water, a tablespoon sized measuring spoon, a small spoon, a parchment paper (affiliate link) lined tray, and a paper towel to dry off your working surface as needed. Keep the potsticker wrappers inside the plastic bag and take out only what you can wrap within a few minutes, this keeps the wrappers soft and pliable.
- Place the potsticker wrapper on a clean dry surface and place 1 tablespoon of filling in the center. If the filling looks round, use the back of two spoons and give it a gentle squeeze so that it’s roughly oval shaped.
- Dip a finger into a bowl of water and wet the edge of the wrapper, and then you have your choice of how to seal it up:
- Easy seal: fold the edges together and pinch so that it’s a half circle. Sealing it this way will take up more room in your frying pan (requires cooking in two batches) and cooking time may vary.
- Easy and fancy seal: use a potsticker mold (affiliate link) to seal the potstickers and have a fancy crimp. This is fast and easy especially if anyone has any hand or dexterity issues however depending on the size of the mold, you might have use a little less filling per potsticker and will need more wrappers. Cooking time may vary.
- Intermediate pleats: If you think of the wrapper as a clock face, start at about 10 o’clock, make a small pleat and pinch, repeat 5-6 times and fold the bottom flap up. Gently check the shape and pleats to make sure the edges are sealed. Watch the video below for a demonstration.
- Traditional pleats: If you think of the wrapper as a clock face, fold the top and bottom halves of the wrapper together and pinch just 12 o’clock and 6 o’clock together. Then tuck 2 o’clock under 1 o’clock, pinch, and keep pleating and pinching until the right side is finished. Tuck 10 o’clock under 11 o’clock, pinch, and keep pleating and pinching until the left side is finished, about 3-4 on each side. Inspect the pleats and gently pinch the entire seal so that loose pleats and corners are sealed. This way might seem difficult but once you try it, you will become skilled with practice.
- Place finished potstickers on a parchment lined tray until ready to fry or freeze. The skins become soft and soggy over time so be sure to work on a dry surface and pan fry or freeze as soon as possible.
- If you have helpers or you can assemble the potstickers quickly, then you can speed up the process by laying out a few wrappers at the same time, load them with filling, and then seal them.
- This recipe makes 22 potstickers which is exactly how many I can fit in my 14 inch frying pan. If your frying pan is smaller, be prepared to pan fry in multiple batches or freeze some if you are short on time.
Make ahead options:
- You can make the potsticker filling in advance and marinate the meat for at least 30 minutes and up to 1 day in advance.
- You can assemble them in advance and then freeze them without touching each other on a parchment paper lined tray for a few hours and then transfer to a freezer bag.
- When you are ready to cook the frozen potstickers, do not thaw them but allow a few extra minutes of cooking time.
- Sometimes I double or triple the recipe and end up with extra filling or unused wrappers. Between the two options, I prefer to use up all the wrappers and make sticky rice with the extra filling.
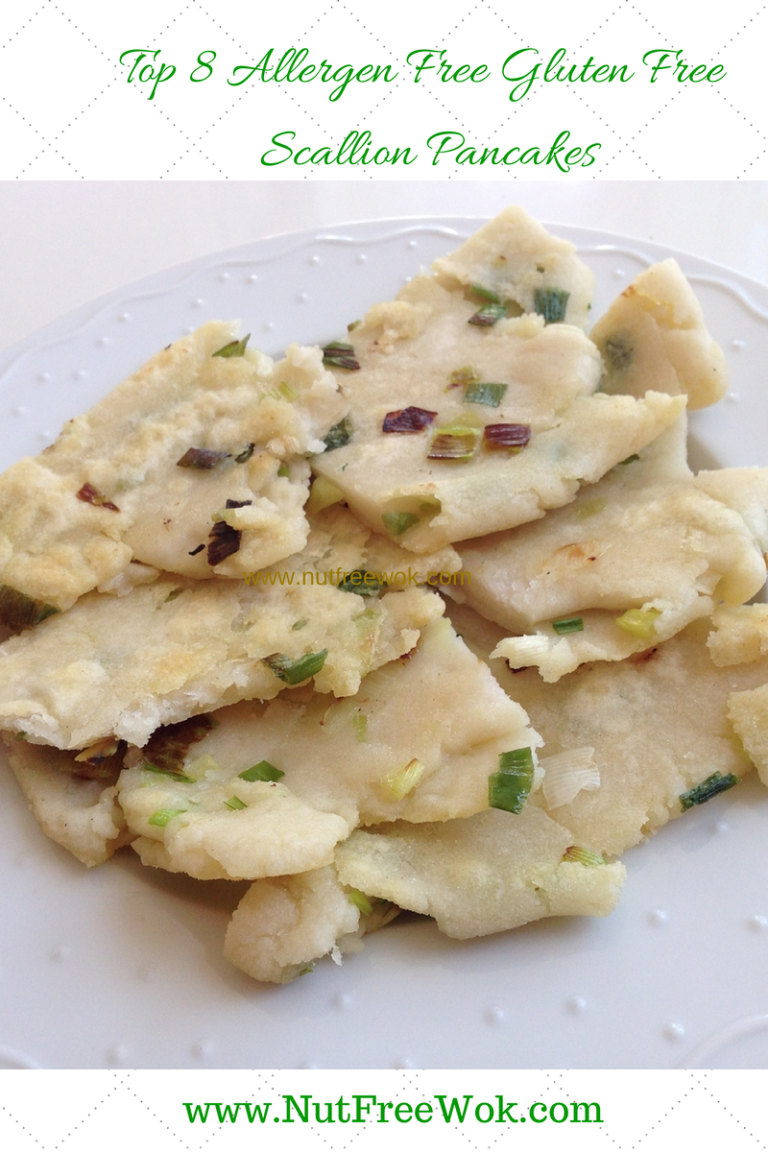
- If I dip my potstickers at all, I like using white vinegar, it’s simple and healthy. However, if I were serving potstickers to friends, I would make a simple soy-vinegar dip as I mentioned in my Scallion Pancake recipe (recipe included in the notes below).
Shopping for Potsticker Wrappers
It seems to me that Asian companies which make fresh noodles and wrappers use basic ingredients such as wheat and eggs. Most premade potsticker wrappers are not suitable for people with wheat allergies. I did try making a gluten free potstcker which was edible but the recipe is not ready to share yet.
I buy potsticker wrappers made by New Hong Kong Noodles, which is a large local company with distribution along the West Coast. When I called them, they weren’t effusive but told me that they do not use nuts in their facility. However they do use egg in some products but not in the potsticker wrappers so it’s safer to assume that there is a risk of cross contact with eggs.
I have also tried Dynasty’s gyoza wrappers and they do not contain egg in the ingredients, but I suspect that they are made on shared equipment with egg as well. Readers who are allergic to egg need to call or email the manufacturers of potsticker wrappers before using.
Allergy Aware Potstickers
My children love when I made potstickers from a hot water dough instead of store bought wrappers. However due to the gluten in the dough, I only have patience to make small batches which means I have to also make other entrees to round out our meals. Maybe with my new found acceptance of making small batches, I might be able to master it. If you want to try a recipe with a homemade from scratch wrapper, try my recipe for Chicken with Corn Potstickers.
Be sure to refer to What’s in Nut Free Wok’s Cupboard for more details about the products I use to season the pork filling. If you are allergic to an ingredient, it’s okay to omit it or substitute something similar that you can safely eat but results may vary.
- If you are Soy free: try other soy sauce substitutes or soy free soy sauce or salt (approximately 1/8th of a teaspoon of salt per 1 teaspoon of soy sauce), check oyster sauce ingredients
- If you are Shellfish free: omit the oyster sauce and use the equivalent of soy sauce with a pinch of sugar
- If you are Sesame free: omit, no substitute needed
- If you are Corn free: use tapioca or potato starch and check oyster sauce ingredients

Chinese Potstickers Recipe: Pork & Napa Cabbage
Ingredients
- 4 oz napa cabbage leaves approximately 6 leaves
- 1/2 teaspoon salt
- 1/2 pound ground pork
- 1 scallion chopped
- 2 teaspoons soy sauce
- 1 teaspoon oyster sauce
- 1 teaspoon sesame oil
- 1/2 teaspoon garlic powder or 1 clove minced garlic
- 1/4 teaspoon sugar
- 1/8 teaspoon white pepper or black pepper
- 1 teaspoon cornstarch
- 22 potsticker wrappers have a few extras just in case
- 1 teaspoon oil whatever is safe for you, I like olive oil
- Nonstick cooking spray optional
- 1/3 cup hot water more might be needed
- White vinegar or dipping sauce for serving see notes below
Instructions
Make the filling
- Wash, dry, and finely chop napa cabbage (I like to stack them, cut the stem into 1/4 inch strips and then chop).4 oz napa cabbage leaves
- Add the chopped napa cabbage into a medium bowl, add salt and mix, set aside for 10 minutes.4 oz napa cabbage leaves, 1/2 teaspoon salt
- Place ground pork into a large mixing bowl and add chopped scallions, soy sauce, oyster sauce, sesame oil, garlic, sugar, and white pepper and mix.1/2 pound ground pork, 1 scallion, 2 teaspoons soy sauce, 1 teaspoon oyster sauce, 1 teaspoon sesame oil, 1/2 teaspoon garlic powder or 1 clove minced garlic, 1/4 teaspoon sugar, 1/8 teaspoon white pepper
- Add cornstarch to the pork mixture and mix.1 teaspoon cornstarch
- Grab small handfuls of napa cabbage and squeeze out the excess liquid, add the napa cabbage to the pork mixture, and mix evenly (discard the salty napa cabbage liquid).
Assemble potstickers (refer to the blog post for details)
- Place a wrapper on a clean dry surface and add 1 tablespoon of filling in the center, give the meat a tiny squeeze between two spoons to give it an oval potsticker shape.22 potsticker wrappers
- Dip a finger into a bowl of water and wet the edge of the wrapper, and then pleat to seal:
- Think of the wrapper as a clock face, start at about 10 o’clock, make a small pleat and pinch, repeat 5-6 times and fold the bottom flap up.
- Gently check the shape and pleats to make sure the edges are sealed (see video for a demonstration).
- Inspect the pleats and gently pinch the entire seal so that loose pleats and corners are sealed.
Pan fry the potstickers
- Heat up a large frying pan on medium high heat (be sure that whatever pan you use that it has a matching lid), I use a 14 inch stainless steel heavy frying pan.
- When the frying pan is hot and drop of water sizzles and dances on the frying pan, add oil and swirl, add non-stick cooking spray if desired (optional).1 teaspoon oil
- Quickly arrange the potstickers in the frying pan and pan fry for about 3-4 minutes until the bottoms are golden brown.
- Have a lid in one hand and use your other hand to add the hot water to the frying pan, the water will sizzle and steam, immediately cover the frying pan with the lid to steam the potstickers.1/3 cup hot water
- Do not lift the lid to allow the dumplings to steam for 6 minutes on medium heat.
- Check for doneness, if the potsticker skins are still slightly opaque, add 2 tablespoons of hot water, cover, and steam for another 2 minutes (definitely do this step if cooking frozen potstickers)
- When the potsticker skins are no longer opaque and are slightly translucent, remove the lid and cook for another minute to allow the potsticker bottoms to become crisp and serve with white vinegar or a soy-vinegar dipping sauce (see notes below).
Notes
WHEN COOKING FROZEN POTSTICKERS: do not thaw but allow extra cooking time by adding more hot water at step 17. Approximately 52 calories each
Nutrition
Related Recipes:
If you like potstickers, try my other recipe, Make Chicken Potstickers From Scratch Recipe which features a chicken and corn filling made with a homemade wrapper. It’s a little rustic looking but very delicious. You can swap the filling with either wrap options.
Potstickers are considered an auspicious recipe to serve during the Lunar New Year. If you need other recipe ideas, be sure to check out my recipes that are appropriate for Lunar New Year gatherings.
Chinese New Year Cake “Nian Gao” Recipe,
Nut Free Chinese New Year Vegetable Stew “Jai” Recipe,
Chinese Style Steamed Fish & Chinese New Year
“Bok Cheet Gai” Slow Cooker Chinese White Cut Chicken
Delicious Red Bean Black Glutinous Rice Soup Recipe
Thanks for reading, please help Nut Free Wok!
If you like this post or recipe, please be sure to give a 5 star rating, leave a comment, and share this post! Your support means a lot to me.
Subscribe to Nut Free Wok’s email subscription (be sure to respond to the confirmation email). You will be notified by email next time I publish another post or recipe and I won’t send you spam or share your email address with anyone.
Disclosure/Disclaimer:
I may mention the names of stores and/or brand names of products that I use because readers ask and I share products and sources which I use and think may be helpful to readers, all opinions are my own. Please note that manufacturing practices and ingredients can change at anytime without notice and readers are always responsible for assuring allergen safety before buying or consuming foods. NutFreeWok.com is a participant in the Amazon Services LLC Associates Program, an affiliate advertising program designed to provide a means for sites to earn advertising fees by advertising and linking to Amazon.com. Thank you for reading!



I love pot stickers, these sound delicious!
Thank you, Joy!
Thanks for this fabulous recipe! You’ve out done yourself again. I can’t wait to make it. I know it won’t taste as good as yours, but at least I know it’ll be safe for the kiddos 🙂
Thank you, Cherisse! Yours will taste just great. A little trick is to pan fry a teaspoon of filling and then you can adjust the flavor according to your preferences. I usually am a little bit light on seasoning because I like to taste the freshness of the meat and vegetables. 🙂
I love potstickers and every time I buy them frozen, I vow to make my own. Now with your excellent directions, I should definitely take the plunge. Plus your feeling sounds very appetizing – and I’ll be able to go light on the salt:)
Enjoy, Laura! Frozen potstickers are good, they’re great for soup or a quick breakfast but homemade potstickers are amazing! Enjoy!
I absolutely love pot stickers! These look amazing!!
Thank you, Sherri!
My kind of food, I could eat pot stickers for breakfast lunch and dinner, I never realised that they could be so fast to make from scratch!
Yes, sometimes it’s a little daunting to do the multiple but easy steps. It’s not so bad if I just power through it and way more fun to do with a child or a friend. 😉
I have always wanted to try making potstickers. Yours look delicious!
Let me know how they turn out! I love eating dumplings from other cultures too!
Those sound good. I’m laughing about your big/small batches – I’ve made various dumplings with a Chinese friend who always makes *huge* batches – but then has them for the freezer! She sort of looks at me blankly, though, if I ask about making a dozen or so – it she’s doing it, she wants to get it *done*! LOL (OK, that’s my approach to meatloaf, I do understand…)
So it is nice to see an amount I can picture myself making.
Thank you for understanding my struggle! LOL 🙂
My fav thing in the world!!!!
Me too, it’s so good when they’re fresh and homemade!
Homemade potstickers are the best!!! Crispy crust and juicy meat filling. I love your video that shows the proper way of wrapping potstickers. Very helpful. Thanks for sharing! Have a great weekend.
Thank you! Have a wonderful week! 😀
I love potstickers… I made some frozen ones to eat just today. Your potstickers look much better. 🙂
Aww, thanks! It just takes a little bit of practice!
Great info Sharon! We don’t personally have any allergies in our house but I was trying to bring asian dishes as a pot luck at school and was having a hard time find any of my own recipes that would fit vegetarian and nut free.
I just started blogging and found you over at FBC. Hope we can connect more again soon 🙂
You are so kind to make sure what you share is nut free for school potlucks! Good luck, I’m sure you’ll figure out something delicious. 🙂
Delicious! I’d like to try it!
Enjoy, Lia!