
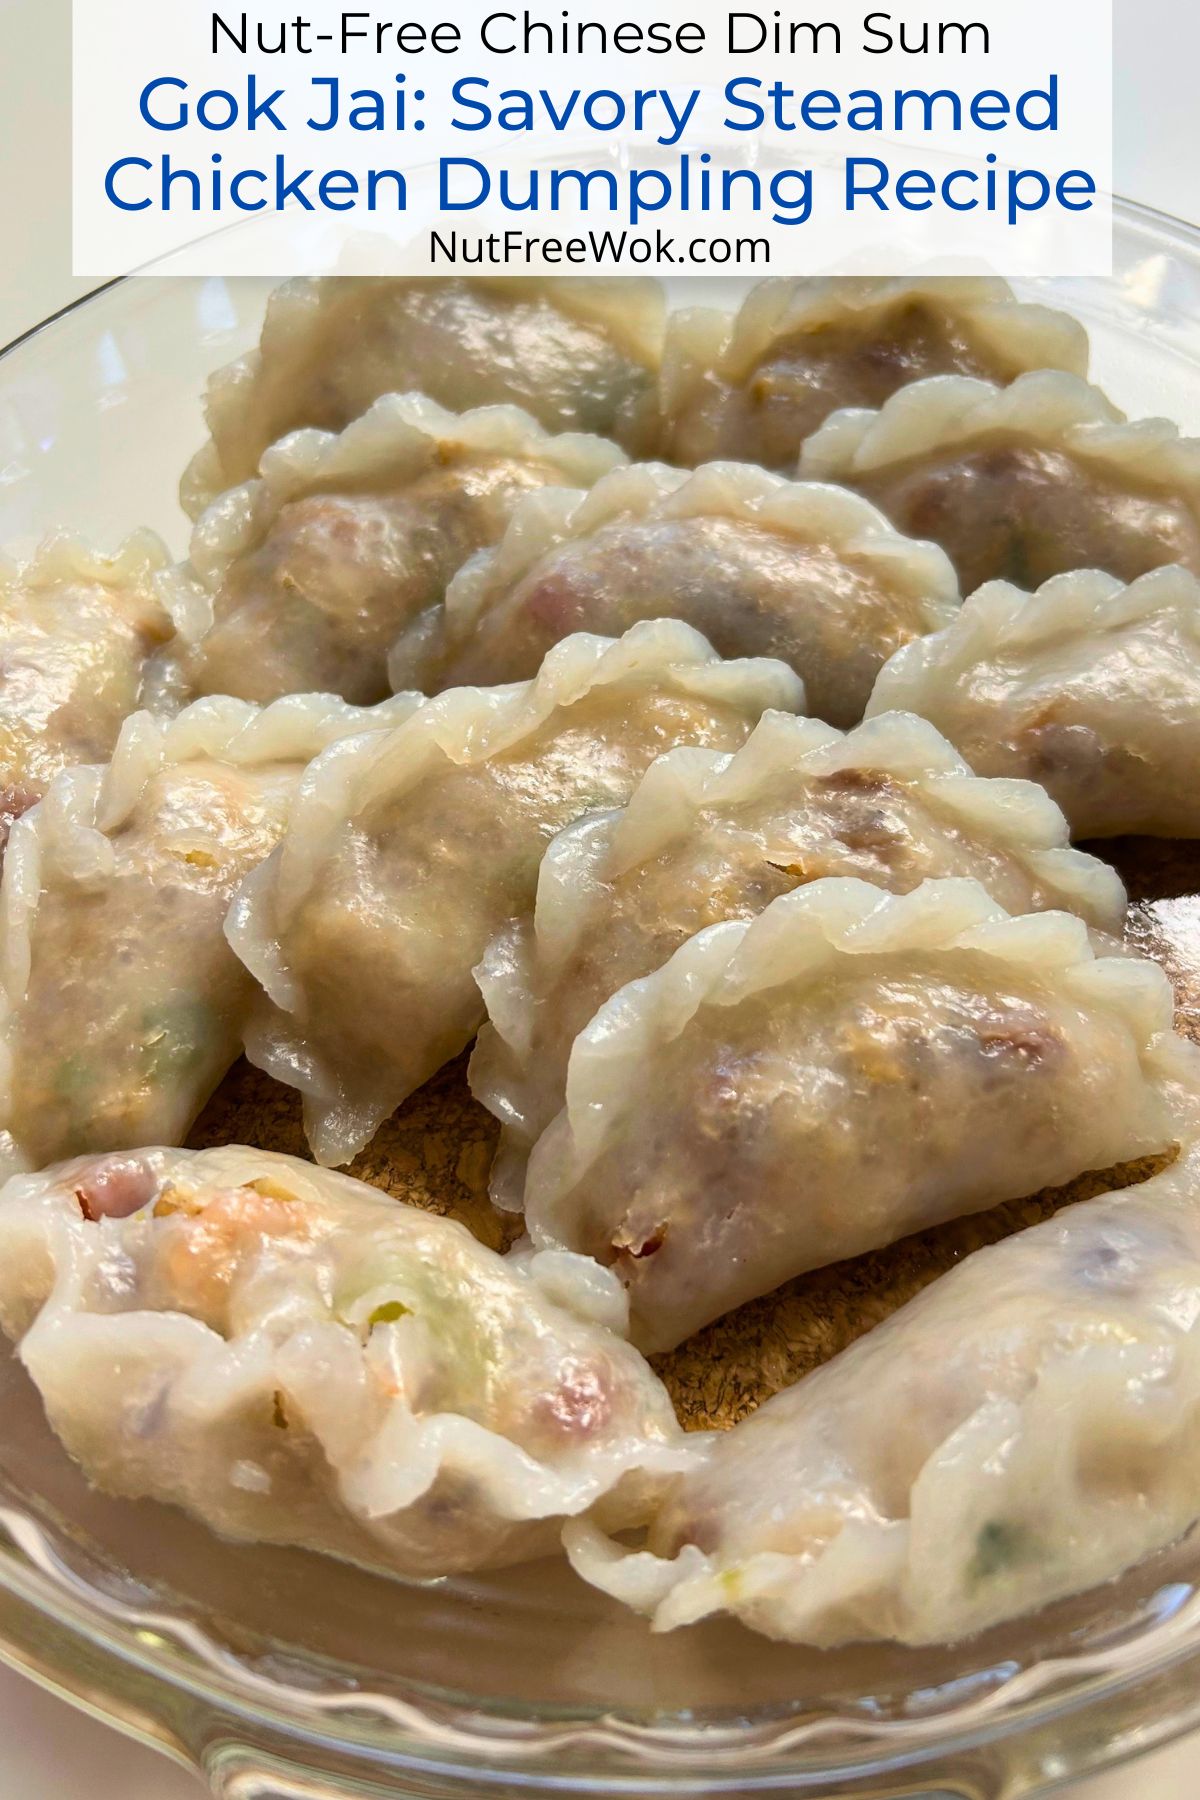
Learn how to make “gok jai” also known as Zhongshan fun gor, which is a savory, steamed dumpling with a tender, translucent wrapper. You will love this nut-free dim sum, appetizer, small bite recipe.
Disclaimer: Please check that all ingredients are suitable for your allergies and be sure to ask your medical care team regarding any allergy related questions (I do not share medical advice). As an Amazon Associate, I earn from qualifying purchases.
Our Longdu Family’s Favorite Steamed Savory Dim Sum
My family makes a savory, steamed dim sum dish called 角仔 “gok jai”. The meat, dried shrimp, and veggie filling is wrapped with a wheat starch and tapioca starch dough, shaped into a half-moon crescent with a decorative rope-braid edge (like empanadas). Gok jai are peanut-free and tree nut-free.
There was one time I saw an item called 中山粉果 “Zhongshan Fun Gor” on a menu at a dim sum restaurant. Both of my parents are from Zhongshan in the Guangdong Province (hi to all my Longdu cousins). I was surprised to when the Zhongshan fun gor were gok jai, just like the ones my family makes. Another way to reference these dumplings is 咸角仔 “haam gok jai” (haam means salty).
Caveat: Some Dumplings Contain Hidden Allergens
However, there is another type of gok jai that is also a crescent-shaped dumpling with a rope-braid edge but is filled with sugar, chopped peanuts, sesame, and coconut flakes and then deep fried until golden brown. And that is also called “gok jai” which is so confusing to me! Sometimes people might call them 油角 “yau gok” (yau means oil).
As I taught my sons how to make this gok jai recipe, I told them about how “gok jai” could refer to the savory, peanut-free steamed dumplings or it could refer to a sweet, peanut (and sesame and coconut) filled deep-fried dumpling. Someone with a peanut allergy should avoid the deep fried gok jai because they may contain peanuts.
Some steamed “fun gor” might have peanuts
Because peanut-free gok jai might also be called Zhongshan fun gor, sometimes people might just call them fun gor. But there’s another type of fun gor called 潮州粉果 “Chiu Chow fun gor” or “Teochow fun gor” that has a vegetable and peanut filling. They might be shaped like a vase or like a scallop but not always. I am very cautious about dim sum restaurants which serve Chiu Chow fun gor. The steamed dishes are steamed in the same area with a chance of peanut cross-contact.
Gok Jai Filling Ingredients
One advantage of learning how to make gok jai or any kind of dumpling is that you know exactly what are the ingredients inside the dumpling. Savory gok jai dumplings are usually filled with finely minced pork shoulder, Chinese sausage (lop cheong), dried shrimp, water chestnuts, shiitake mushrooms, dried turnip/radish, onions, and scallion.
Ingredient Swaps for This Recipe
Over the years, I’ve made a few ingredient swaps due to dietary preferences, our food allergies, and availability of ingredients.
- Due to my own dietary needs, I swapped the minced pork shoulder with ground chicken. You can use ground pork or ground turkey instead of ground chicken if you prefer.
- Also, instead of using traditional lop cheong (Chinese sausage) that is made from pork, I buy chicken and pork lop cheong for a lower fat option.
- I recommend using small-sized dried shrimp for this recipe. I have medium-sized dried shrimp which are a little bit too big for this recipe. After a 2-3 minute soak in water, I drain and rough chop them. If you’re not sure about the sizing of your dried shrimp, then use as-is if they’re smaller than a pea or give them a rough chop if they’re bigger than a pea.
- I don’t use water chestnuts for this recipe. Fresh water chestnuts are difficult to source and are time-consuming to prep. Instead, finely diced jicama is an excellent substitute because it is much easier to buy and faster to prep than fresh or canned water chestnuts.
- One of my sons is allergic to mushrooms and I omit shiitake mushrooms for him. But because shiitake mushrooms are delicious in this recipe, I included instructions in the recipe notes. If you want to learn more about how to buy and prep it, I have more details on my recipe for a Chinese vegetable stew. Some people also like adding rehydrated and chopped wood ear mushrooms.
- I like dried salted turnips in gok jai but I don’t want to buy an entire bag of it to use a tiny amount in this recipe. If you happen to have it, rinse off the excess salt and mince (~1/2 cup) and I would add them into the filling mixture with the chopped scalions.
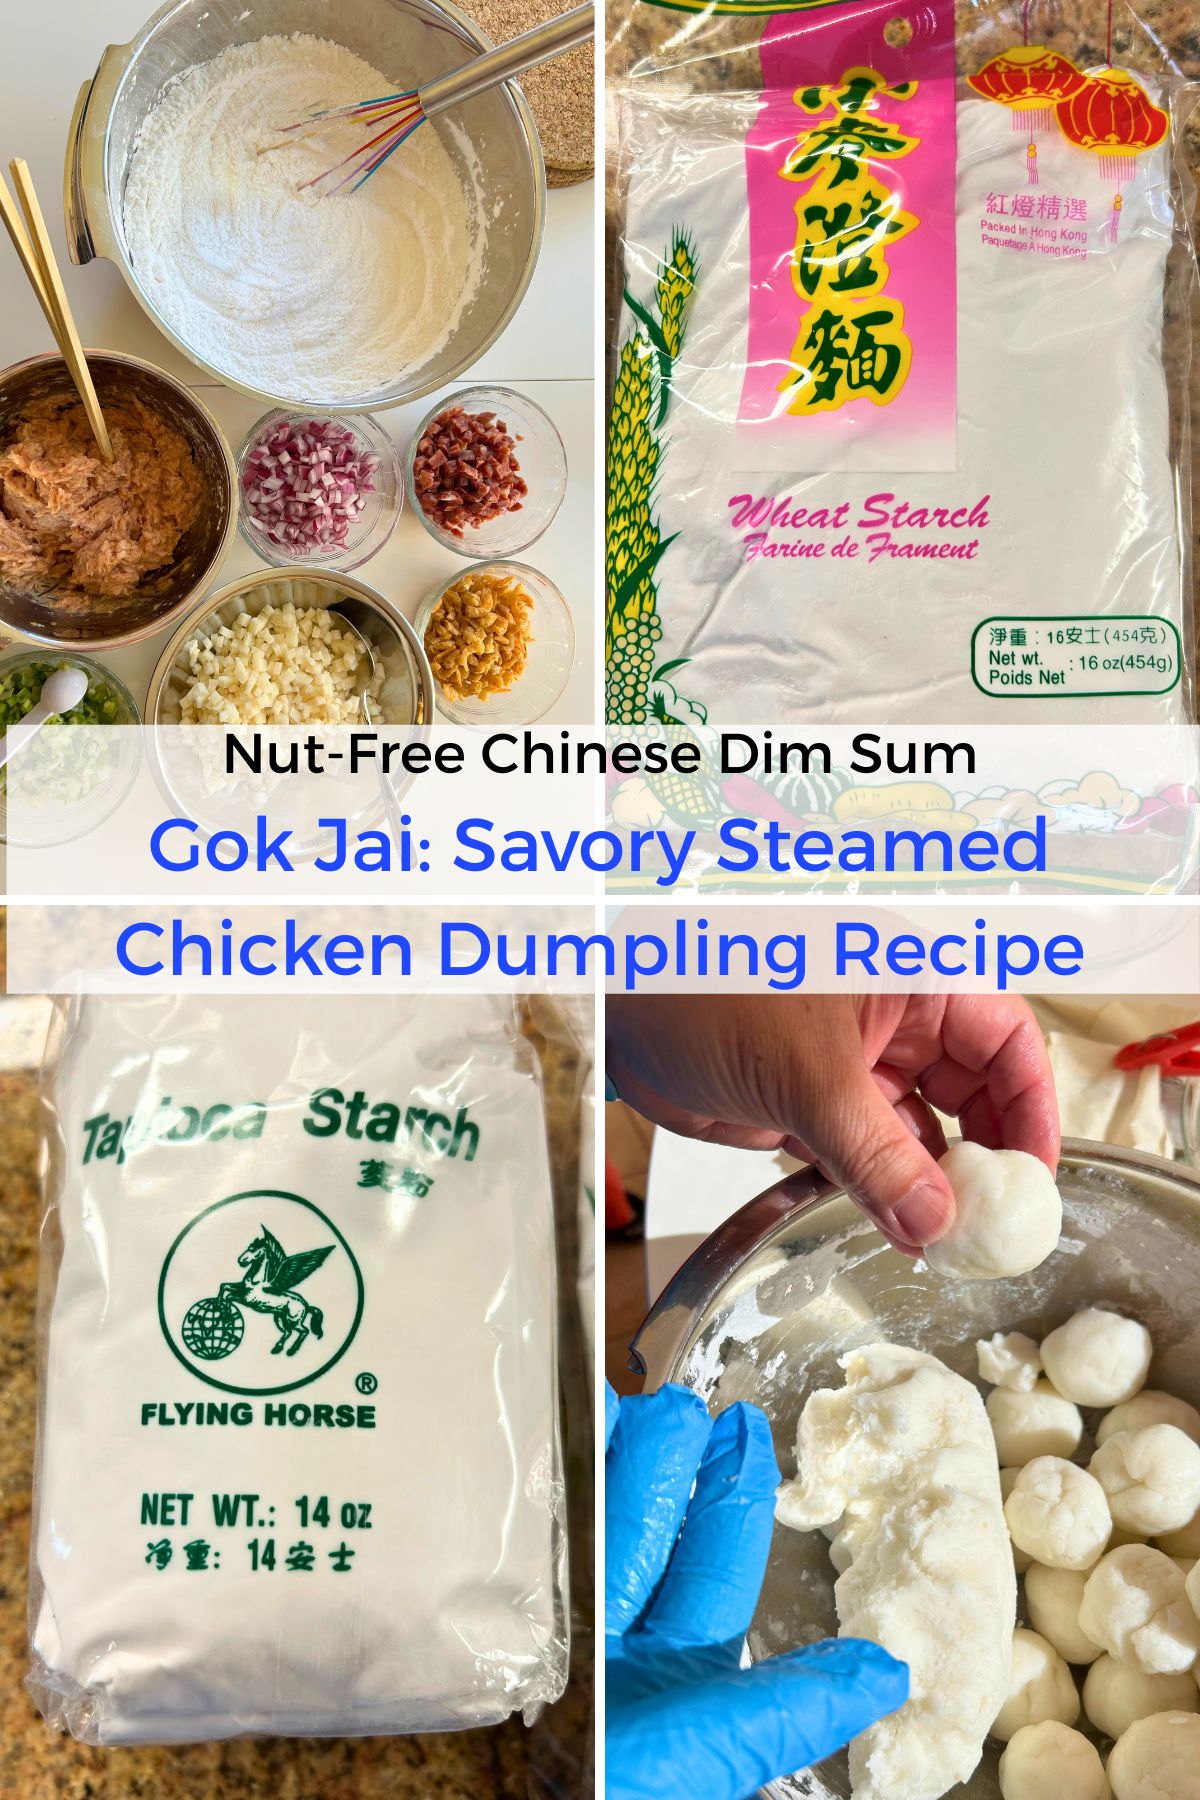
I prep all the of the filling ingredients in about 30 minutes. But before I start stir-frying the filling, I will make the hot water wheat starch dough first. The dough will be too hot to handle. While I wait for the dough to cool down enough to handle, I stir fry and season the filling ingredients.
How to Make a Wheat Starch Dough for Crystal Dumplings
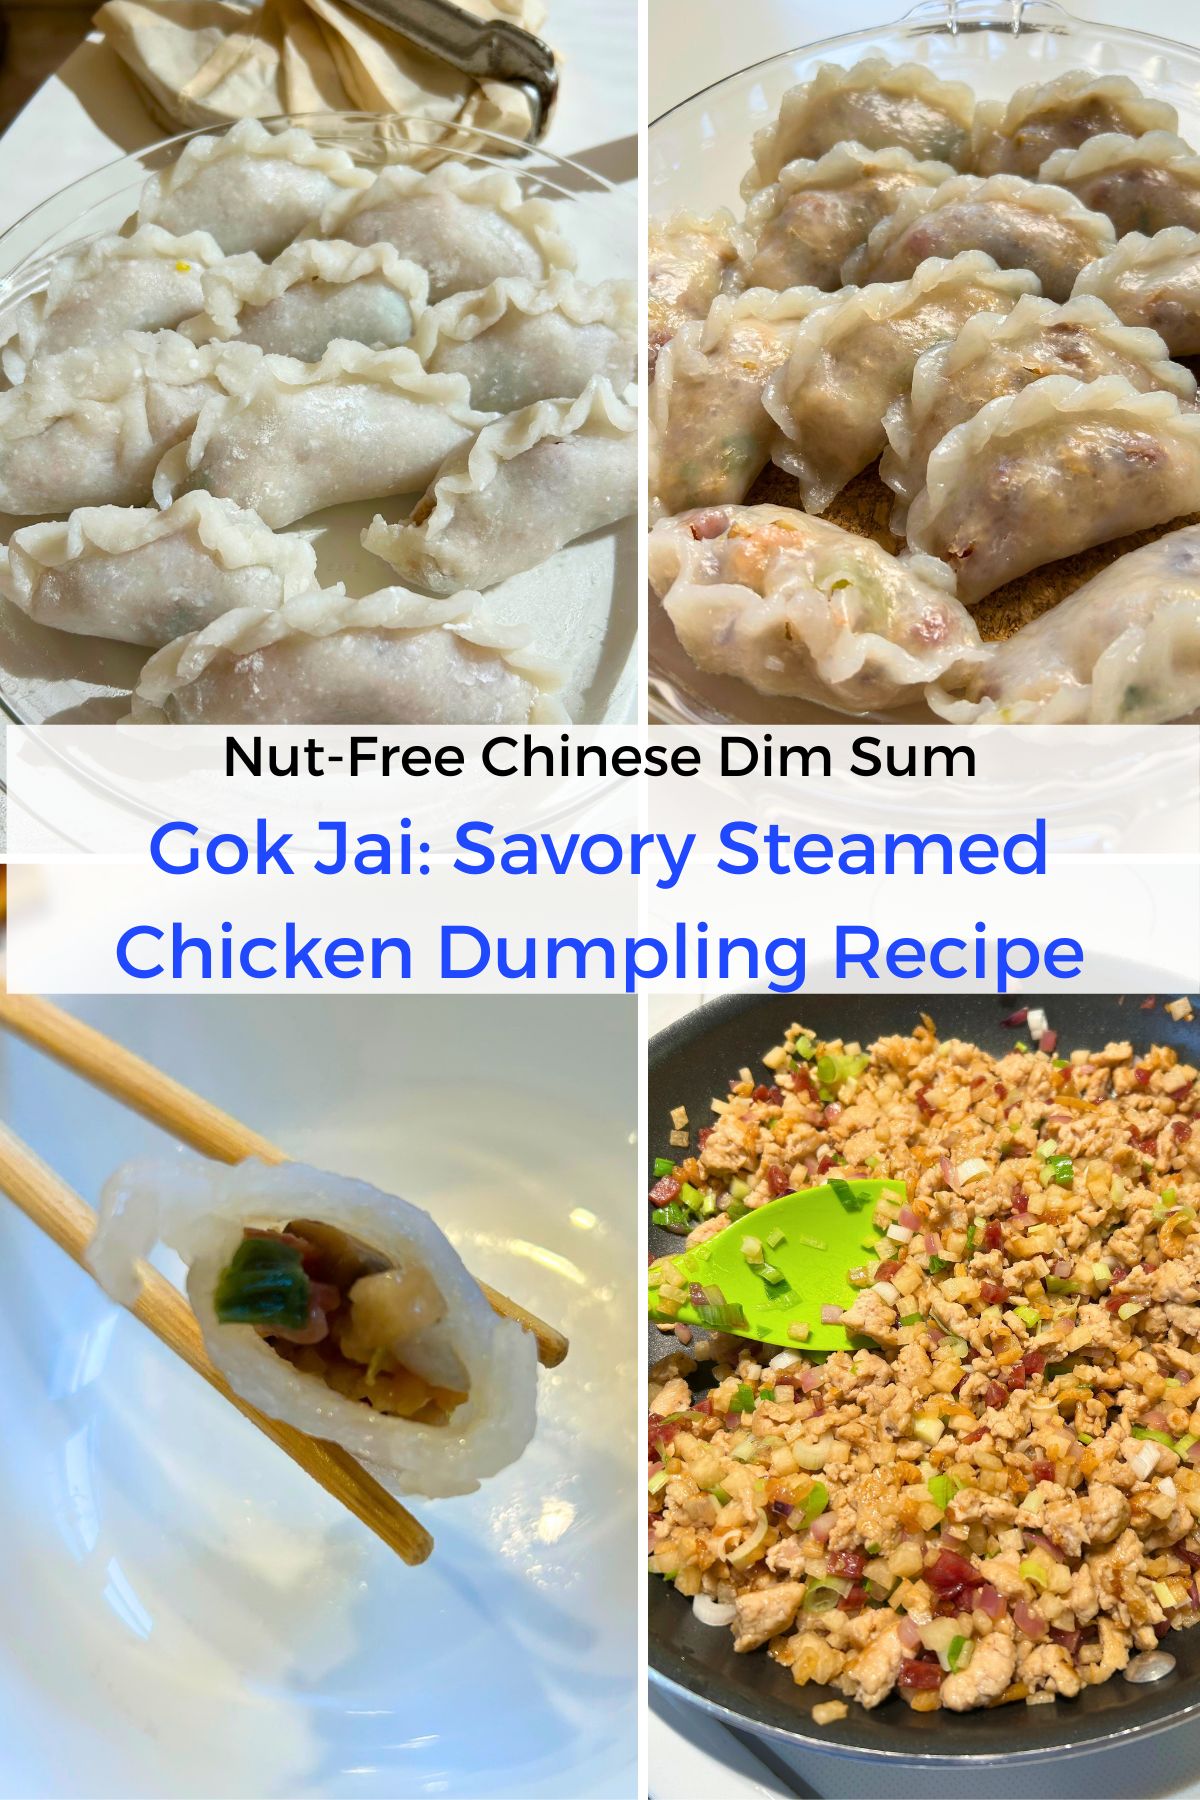
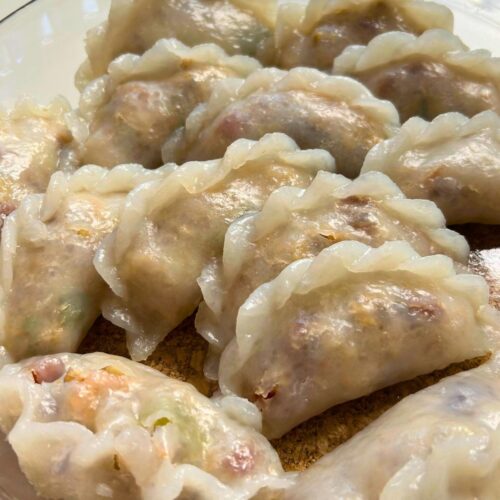
Gok jai dumplings look white and opaque when raw. But after they’re steamed, the wrapper will have a translucent appearance, like har gow (shrimp dumpling). Because these types of dumplings have an almost see through wrapper, they’re sometimes referred to as crystal dumplings.
I make the wrapper by mixing wheat starch, tapioca starch, and boiling hot water. While it’s possible to make the dough from all wheat starch, the resulting wrapper might tear apart easily. The tapioca starch (also called tapioca flour) will make the wrapper a little bit firmer and less likely to fall apart.
It’s possible to prep and stir-fry the filling ingredients in advance but not the wrapper dough. Once you make the hot water dough, you must assemble the dumplings while the dough is still warm and soft. The dough is pliable and easier to work with when it’s still soft and warm. Allow a 20-40 minute wait for the hot water dough to cool. Make the wrappers, assemble the gok jai, and steam them during the same cooking session.
Make a hot water dough
Combine the starches and boiling hot water in a large heatproof bowl. You can also use a 4 quart or larger pot with a lid. Pour the hot water slowly in a circle over the starch and use a wooden spoon or chopsticks to stir to combine at the same time. Continue to stir the dough until the dough is a shaggy rough dough.
Then cover the bowl with a dinner plate or lid and wait for the dough to cool down 20 to 40 minutes so that it’s temperature-safe to touch. Covering the dough with a dinner plate or lid prevents the dough from drying out.
Safety precautions about hot dough
Be certain to use a large heat-proof mixing bowl or a 4 quart or larger pot with a lid. You will also want to place the bowl (or pot) on a damp towel to keep the bowl in place. Also be mindful of pets, small children, and other people around your work area.
Since the dough is made with boiling hot water, I wait at least 20 minutes before kneading the dough. Pinch the dough gingerly with your fingertips to check the temperature. Never plunge your hand into the dough until you’re certain it’s temperature-safe. If you have a food thermometer, use it to check that the temperature is 110°F or less before kneading.
I wear a food-safe glove, coat it with some oil as I add oil to the hot water dough. If the dough is hotter than expected, the oiled glove slips out out easily. And if not, I can take my hand out of the glove. I do not want to have gobs of boiling hot dough stuck to my bare hand. I’m so cautious, I like to wear a nitrile glove over a kitchen cut-resistant glove or cotton gloves to protect my hand from the direct heat.
You will want to knead until the dough is mostly smooth. Break up any dry clumps of starch in the dough. Pat and shape the dough into a circle and divide it into quarters. Cover the bowl of dough in order to keep the dough warm and pliable.
Gok Jai Assembly
Add a few tablespoons of wheat starch, tapioca starch, or even cornstarch to a small bowl. When your fingers are sticky, dip your fingertips in the starch to dust your fingers. Sometimes when you’re assembling the dumplings and pinching them close, the edges will stick to your thumb or fingers instead of sealing shut. Dip your finger tips into the bowl of starch and you should be able to pinch the dumpling edges together.
Making the wrappers
Take a quarter of dough out of the bowl and roll the dough into a log. Pinch off lumps of dough approximately the size of a large cherry tomato and roll them into balls. You should expect to make 12-15 evenly sized dough balls per quarter of dough. If you have a digital scale, the dough balls should weigh approximately 25 grams.
I use my mom’s tortilla press lined with parchment paper to flatten the dough balls into wrappers. Using a tortilla press is the easiest way to press the dough into a 3.5-inch round. If you notice that the side closer to the hinge is thinner than the side closer to the handle, flip the wrapper over and press again so that the circle is evenly thin. Once the dough is flattened, it might dry out fast so just flatten a few dough balls at a time.
- If you don’t have a tortilla press, flatten a dough ball with the heel of your palm into a cookie shape. Then roll the dough into a flat, thin, circle with a small wooden rolling pin. A tapered rolling pin is even better because you want the outer edges to be a little bit thinner.
- If you want to flatten the dough ball by hand, then flatten the dough with the heel of your palm into a cookie shape. Then use your fingers and thumb to press the dough into a flat or cup-shaped circle.
The Actual Number of Dumplings Made Might Vary
It’s very common to make dumplings as a group activity but then there’s more variability in the results. You might end up using all the dough and have some leftover filling or vice versa, use up all the filling and have extra dough. Here’s what happened during my recipe testing:
Recipe test round 1:
My mom, son, and I made approximately 48 dumplings and we had a lot of filling leftover. I tried to make the dough balls evenly sized but I think each person had a different filling style.
- I tend to put as much filling as possible into the wrapper and have enough experience/finesse to seal them shut.
- My mom’s preference is to put in as little filling as possible because she likes eating the wrapper more than the filling.
- My son’s filling style is probably more in between the two of us. He tried to put a little more filling than my mom but not as much as I do so that he could seal the dumplings.
Recipe test round 2:
Since I had so much filling leftover from the first round of recipe testing, I increased the dough recipe by 50%. To be consistent, I weighed each of the dough balls (~30 grams each). I asked everyone to fill the dumplings as best as they could. We made 75 dumplings with all of the filling and most of the leftover filling from the previous recipe test.
Recipe test round 3:
I decided to go back to the original dough recipe and did not weigh the dough balls. But I made them a little smaller (approximately 25 grams) and we got better at adding more filling to each dumpling. We made 58 gok jai and used up all the wrappers and all but 1 tablespoon of the filling.
Recipe test round 4:
The goal of this recipe test is to see if someone else could follow the recipe. This recipe is not a beginner recipe but it’s also not hard if you have all the information you need.
My son cooked and seasoned the filling and he made and kneaded the hot water dough. During the assembly, he divided the dough into balls, tried the three methods to flatten the wrappers, and assembled the gok jai. I acted as sous chef/assistant and between the two of us we made 55 dumplings in 3 hours.
I estimate that this recipe will yield approximately 50 to 55 gok jai dumplings. The actual number may vary depending on the size of your dough balls, who is making dumplings with you, etc.. It all sounds complicated but remember that the gok jai will be delicious even if imperfect, and the time together learning something new is precious.
What to do if you have extra wrappers or filling?
If you have extra filling you can easily eat it as is or add it to rice or fried rice. I find it a lot easier to have extra filling, it’s not a problem at all.
I did not know about what people do with the extra wrappers. My mom always stretched the filling and added less filling until all the dough was used up.
My friend asked me about a dish called silver needle stir fry and where to order it. I learned that it’s a Toisan (a neighboring Cantonese region) dish where they shape wheat starch dough into 3-inch long “needles” with tapered tips. Then they either steam or boil the “needles” and then stir fry them with meat and vegetables. It’s totally ingenious. I did find it at a restaurant but only saw it on the menu on my way out the door. I need to go back and try it.
How to Save Time Making This Recipe
I have made these gok jai dumplings many times. But I didn’t blog about it because it’s a lot of information to share, hence this super long post. But everytime I make it without a written recipe, I have to go through the long mental process of remembering how. Sharing this recipe on the blog helps me too!
The biggest time-saver is to recruit help from family or friends when making this recipe. In order to make a satisfying amount of Chinese dumplings, people usually make them as a group activity. However, with more hands in the kitchen, results may vary but practice makes perfect.
The first time I made this recipe for the blog, it took me 6.5 hours which included discussions and wrapping demonstrations with the family. After streamlining the recipe for efficiency, I was able to cut down the time to 3.5 hours with extra hands to help with the wrapping.
Overview of time efficient recipe steps
Instead of making all the filling ingredients first and then making the hot water dough and wrappers, I streamlined the recipe in the following way:
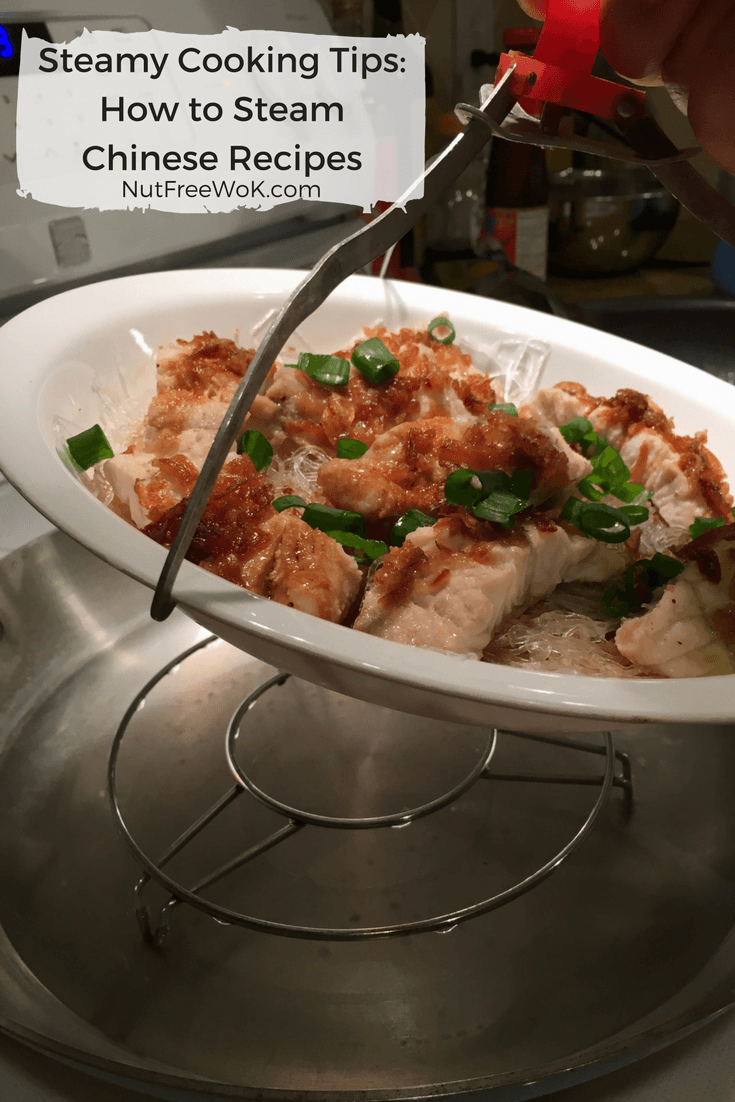
- Set up all the equipment needed so that once you start wrapping the dumplings, there’s minimal wait time to start steaming. I have lots more details with steamy cooking tips.
- Prep all of the filling ingredients and then set aside.
- Make the hot water dough, which requires a 20 to 30 minute waiting time for the dough to cool enough to knead without scalding yourself.
- While waiting for the dough to cool down, stir fry and season the filling ingredients and then set aside to cool down.
- Go back to the hot water dough and if cool enough to handle, knead and shape into small balls in batches to flatten into wrappers and fill the dumplings.
- With a lot of help, you might finish wrapping all the dumplings faster than you finish steaming them, which is fine.
- While you finish steaming all of the dumplings, I use the time to clean up and wash dishes.
- You might notice that people gravitate to different tasks. I usually take responsibility for prepping the filling, kneading the dough, preparing the dough balls, steaming the dumplings, and wrapping in between everything else. My son would use the tortilla press to flatten a few dough circles whenever they ran out, my mom focused only on making the dumplings. Figure out what everyone likes to do is how you will find your efficiency sweet spot.
Prep ahead tips:
You can also save time by prepping the filling ingredients ahead of time. It takes me about 30 minutes to prep and chop everything. Stir frying the filling ingredients takes about another 20 minutes. That’s a good stopping point, cover, and refrigerate the filling.
I strongly do not recommend making the hot water dough or wrappers ahead of time. When you make the dough, it’s important to keep it from drying out. It’s not possible to make the hot water dough in advance. Only make the dough when you’re ready to assemble and steam, and you need to work quickly.
Can you double the recipe?
Yes, it’s possible to double the recipe to serve a large group of people or to have some extra dumplings to have on hand for snacks or breakfast during the week. It’s easy to double the filling the recipe and stir-fry it in a large 12-14 inch frying pan.
For the hot dough wrapper, I find it challenging to make just one batch because the ingredients just fits inside my largest mixing bowl with enough room to knead the dough in the bowl. And timing-wise, it’s a race to fill all the wrappers while keeping everything warm and supple.
If I wanted to make a double batch in one session, I would make a batch of wrappers following this recipe and when we are between 50-75% done with using up the dough, I would make another batch of hot water dough. Be sure to allow the at least 20 minutes for the hot water dough to cool down until it’s safe to handle.
Add the filling and shape the gok jai
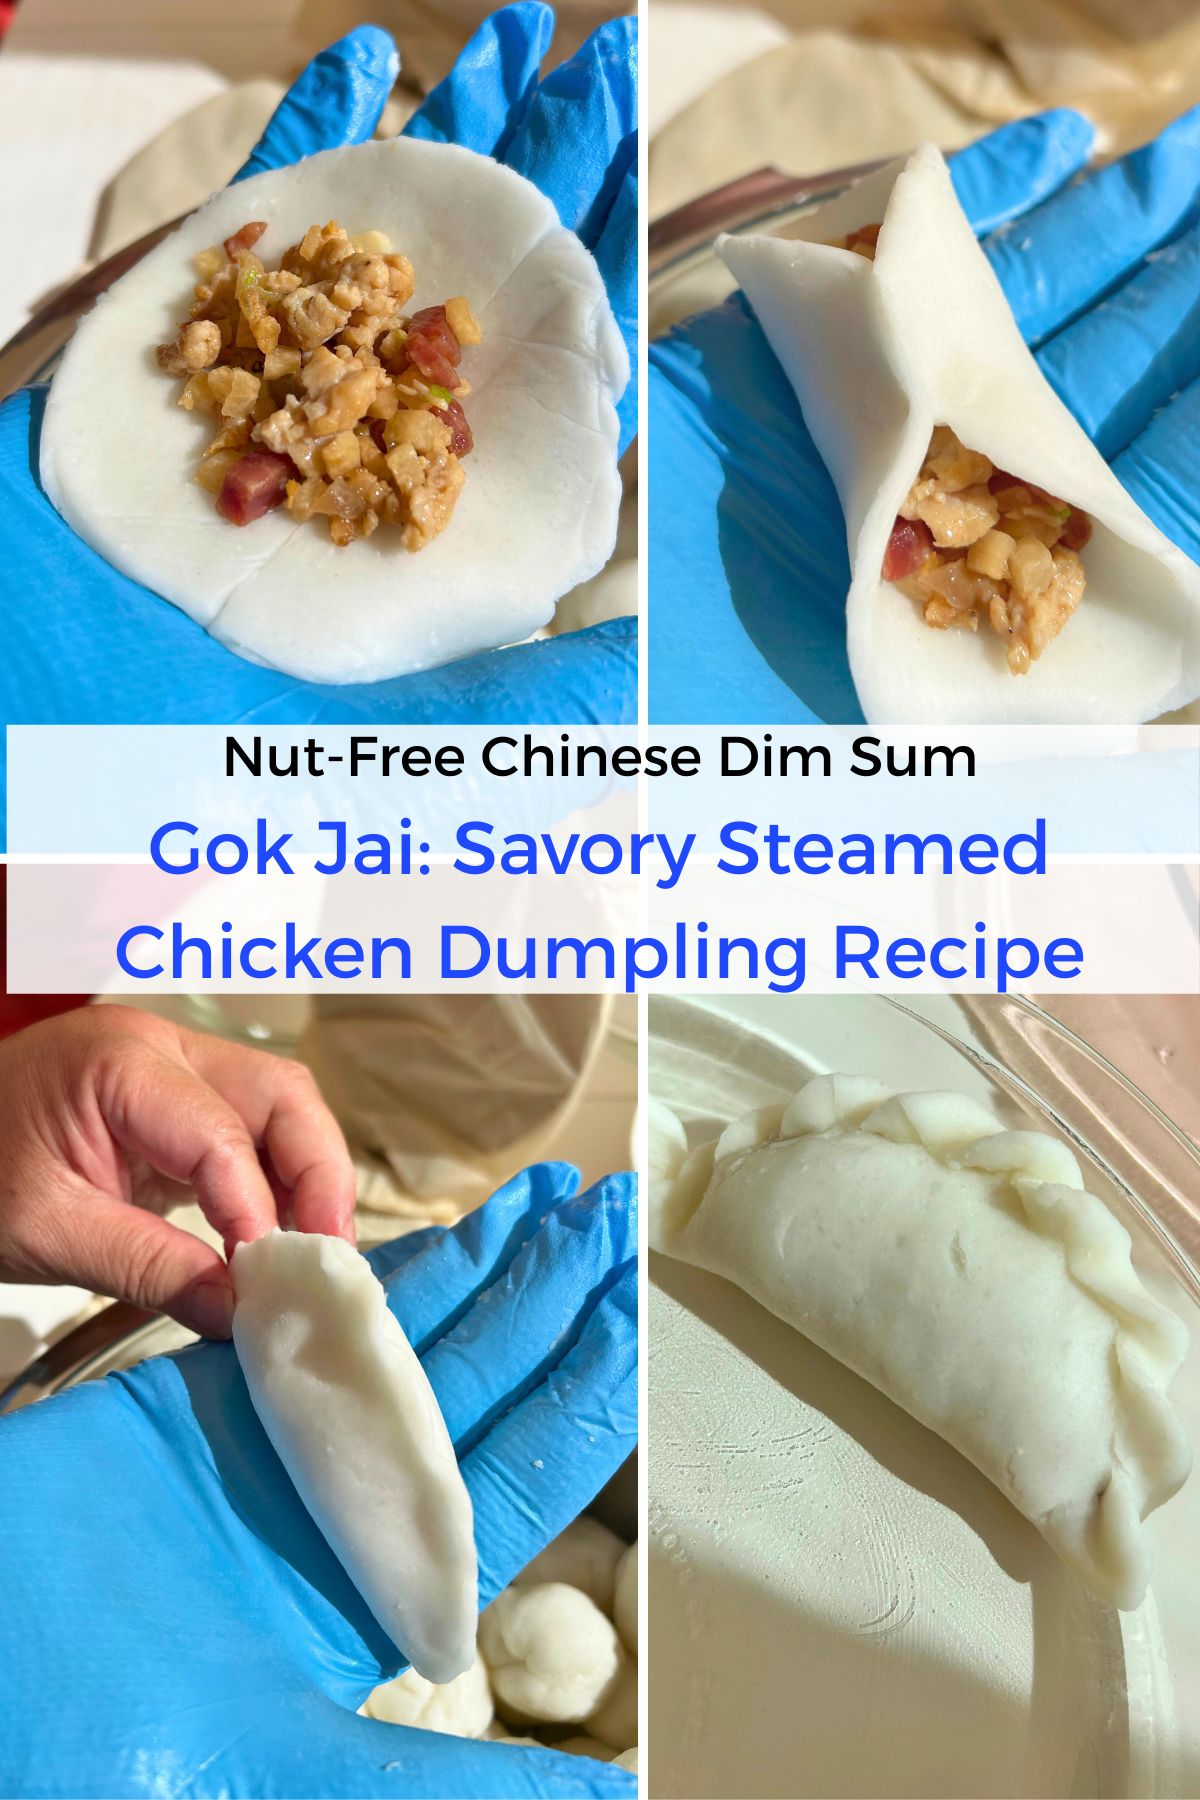
Place the round wrapper in the palm of your hand and cup it slightly. Add approximately 1 to 1.5 tablespoon of filling to the center of the wrapper. Leave a 1/2 inch border without any filling and try to keep the edge dry and free of filling. Cup your hand a little more and gently pinch the edges together to form a half-moon shape. If you have difficulty pinching the edges together because the dough sticks to your fingers, dust your fingers with starch.
To make a decorative rope-braid edge, gently pinch the edges again to taper the edge so that it’s slightly thinner. Starting with the end that is closest to your free hand, use the side of your thumb to fold a small triangle down diagonally and pinch with your index finger at the same time and repeat as you move to the other end.
Serve, store, freeze, and/or reheat
How to serve: The dumplings are best served freshly steamed and still hot. Because they’re already seasoned, we usually enjoy them plain. You could serve them with some soy sauce or chili oil, typical dim sum condiments, on the side. Typically people eat 6-9 pieces of dim sum as a meal and maybe 3 pieces as an appetizer or snack.
How to store leftovers: I usually wrap the plates of steamed dumplings with a plastic wrap and refrigerate. It’s best to eat them within 2 to 3 days.
The easy way to reheat the gok jai is to microwave them for 30-60 seconds. Your exact timing may vary depending on how many you reheat and your microwave’s wattage. The dumplings are ready to eat when warm and the wrapper is soft. If the microwaved dumplings still seem dry or hard, drape a damp paper towel on the dumplings and microwave for another 30 seconds.
The best way to reheat the dumplings is to steam them for 5 minutes. This is the best way when you want to reheat an entire plate of gok jai.
If I were to freeze them, I would freeze them flat and not touching each other on a parchment paper lined tray until they’re frozen solid. Then transfer the frozen gok jai to a freezer bag, layered with parchment paper to minimize them sticking together. Freeze up to one month and reheat by steaming for 8-10 minutes (an estimate, you should open one to see if it’s heated through).
Allergy Aware Gok Jai
This recipe is free of peanuts, tree nuts, dairy, eggs, and fish as written.
The recipe does use sesame oil for flavoring but you can easily omit that or stir in a spoonful of sunflower seed butter with the cornstarch slurry, if not allergic to sunflower seeds.
I also season with soy sauce, which contains soy and wheat. If allergic to soy, you can make my soy-free soy sauce recipe which is free of top 9 allergens. If you’re only gluten free, you might be able to make this recipe with gluten free versions of wheat starch, tamari sauce, and Chinese sausage.
This gok jai recipe is not safe for someone with a wheat allergy since wheat starch is a primary ingredient. However, my mom did mention that when she was in China, it wasn’t always convenient to buy wheat starch and people used glutinous rice flour instead. That sounds difficult to me but maybe my mom and I can figure this out.
My favorite flavor is oyster sauce. If you’re allergic to oysters, then try using a vegetarian “oyster sauce” made from mushrooms. Or you can omit oyster sauce and substitute with half soy sauce and half sugar instead.
This recipe also uses dried shrimp and if allergic to shellfish, then you can omit the dried shrimp and use an extra lop cheong or swap in finely diced carrots for color (cook them with the onions and jicama).
Someone in our family is allergic to mushrooms so I left shiitake mushrooms out of the recipe. See the recipe notes for instructions on how to use dried shiitake mushrooms in the recipe notes if you would like to include them.
Shopping for Ingredient Notes and Confusing Names
I want to be sure that you’re able to buy the wheat starch and tapioca starch at your local Asian market and included the Chinese names so you can point to them for help finding the products or at least be able to know what to look for on the package.
Wheat Starch
The only brand of wheat starch available at my local Asian markets is the Red Lantern brand. I cannot find additional information about allergen cross-contact. It seems to work with our family’s nut allergies as I also use wheat starch in rice noodle roll recipes. There are certified gluten-free wheat starch products available but I haven’t made Asian dumplings with them to know if it’s a good substitute.
The starch is called 小麥澱粉 (xiǎomài diànfěn in Mandarin) or 澄麵粉 (chéng miàn fěn). But I know it as 桐麵粉 (tóng miàn fěn). Apparently all of these terms are interchangeable.
Tapioca Starch
The recipe also calls for tapioca starch. I usually use the Erawan brand (with the elephant logo) or the Flying Horse brand, distributed by Walong. Look for the characters 西米粉 or 菱粉 on the package. Both brands are made in facilities without top 9 allergens.
Typically tapioca starch is a product derived from a cassava root (also known as yuca or manioc) and the Chinese characters for tapioca starch is 西米粉 (“say may fun” in Cantonese and Xī Mǐ Fěn in Mandarin). However, on the Flying Horse package, the Chinese characters under the word tapioca starch says 菱粉 (ling fun) which apparently is slang for tapioca starch. Traditional 菱粉 ling fun refers to a starch made from water calthrop.
If you need additional recommendations about ingredients, please read about what’s in my cupboard.
Gok Jai: Savory Steamed Chicken Dumplings, a Nut-Free Dim Sum Recipe
Equipment
- 1 large steamer pot
- 1 steamer rack (or aluminum foil ring)
- 4 pie plates and/or 9 inch round cake pans
- 1 water kettle or medium-sized pot
- 1 medium sized mixing bowl
- 1 large frying pan
- 1 large bowl
- 1 large mixing bowl with lid (or dinner plate) or a large pot with lid
- 1 glass measuring cup (1 cup or larger)
- 1 tortilla press or rolling pin
- parchment paper (or wax paper)
Ingredients
Filling Ingredients
- 1 pound ground chicken or ground pork
- 1 teaspoon oyster sauce
- 1 teaspoon soy sauce
- 1/2 teaspoon ground white pepper or freshly ground black pepper
- 1/2 teaspoon sugar
- 1 teaspoon sesame oil optional
- 2 teaspoons cornstarch
- 2 links chicken-pork lop cheong (Chinese sausage)
- 2 ounces dried shrimp small-sized
- 3/4 pound jicama peeled and finely diced (1.5 cups)
- 1/2 large red onion finely diced (1 cup), or sweet onions
- 4 stalks scallion finely chopped (1/2 cup)
- 2 teaspoons olive oil divided
- 1 teaspoon sugar divided
- 1 teaspoon soy sauce divided
Cornstarch Slurry
- 1 teaspoon oyster sauce
- 1 teaspoon soy sauce
- 2 teaspoons sesame oil optional
- 2 teaspoons cornstarch
- 2 tablespoons water
Wrapper Ingredients
- 1 pound wheat starch approximately 3.25 cups
- 3/4 cup tapioca starch
- 1/2 teaspoon salt
- 4.5 cups water boiling hot
- 2 tablespoons olive oil divided
- 1/4 cup tapioca starch, wheat starch, or cornstarch for dusting work surfaces and fingers as needed
Instructions
- Set up a large, wide pot to steam the dumplings by adding a steam rack. Check that your pie plates and/or cake pans will fit inside the pot with the lid on and allow at least 1/2 inch of clearance around the sides and over the the filled pie plates/under the lid. Then filling the pot with water up to the level of the steam rack, do not turn on the heat until you're ready to knead the dough and assemble.
- Fill a water kettle or a second medium-sized pot with water and cook on low heat. You will need at least 5 cups of water to make the hot water dough and more later to add hot water to the steamer pot everytime you steam another pie plate of gok jai. Bring to a boil when you are ready to make the hot water dough.
Filling prep instructions:
- Marinate the ground chicken: place all of the ground chicken in a medium-sized mixing bowl and add 1 teaspoon oyster sauce, 1 teaspoon soy sauce, 1/2 teaspoon ground white pepper, 1/2 teaspoon sugar, and 1 teaspoon sesame oil (if using), then stir with a fork or chopsticks until combined. Add 2 teaspoons cornstarch and stir until combined. Set aside in the refrigerator to marinate for 15-30 minutes, or until ready to stir-fry.
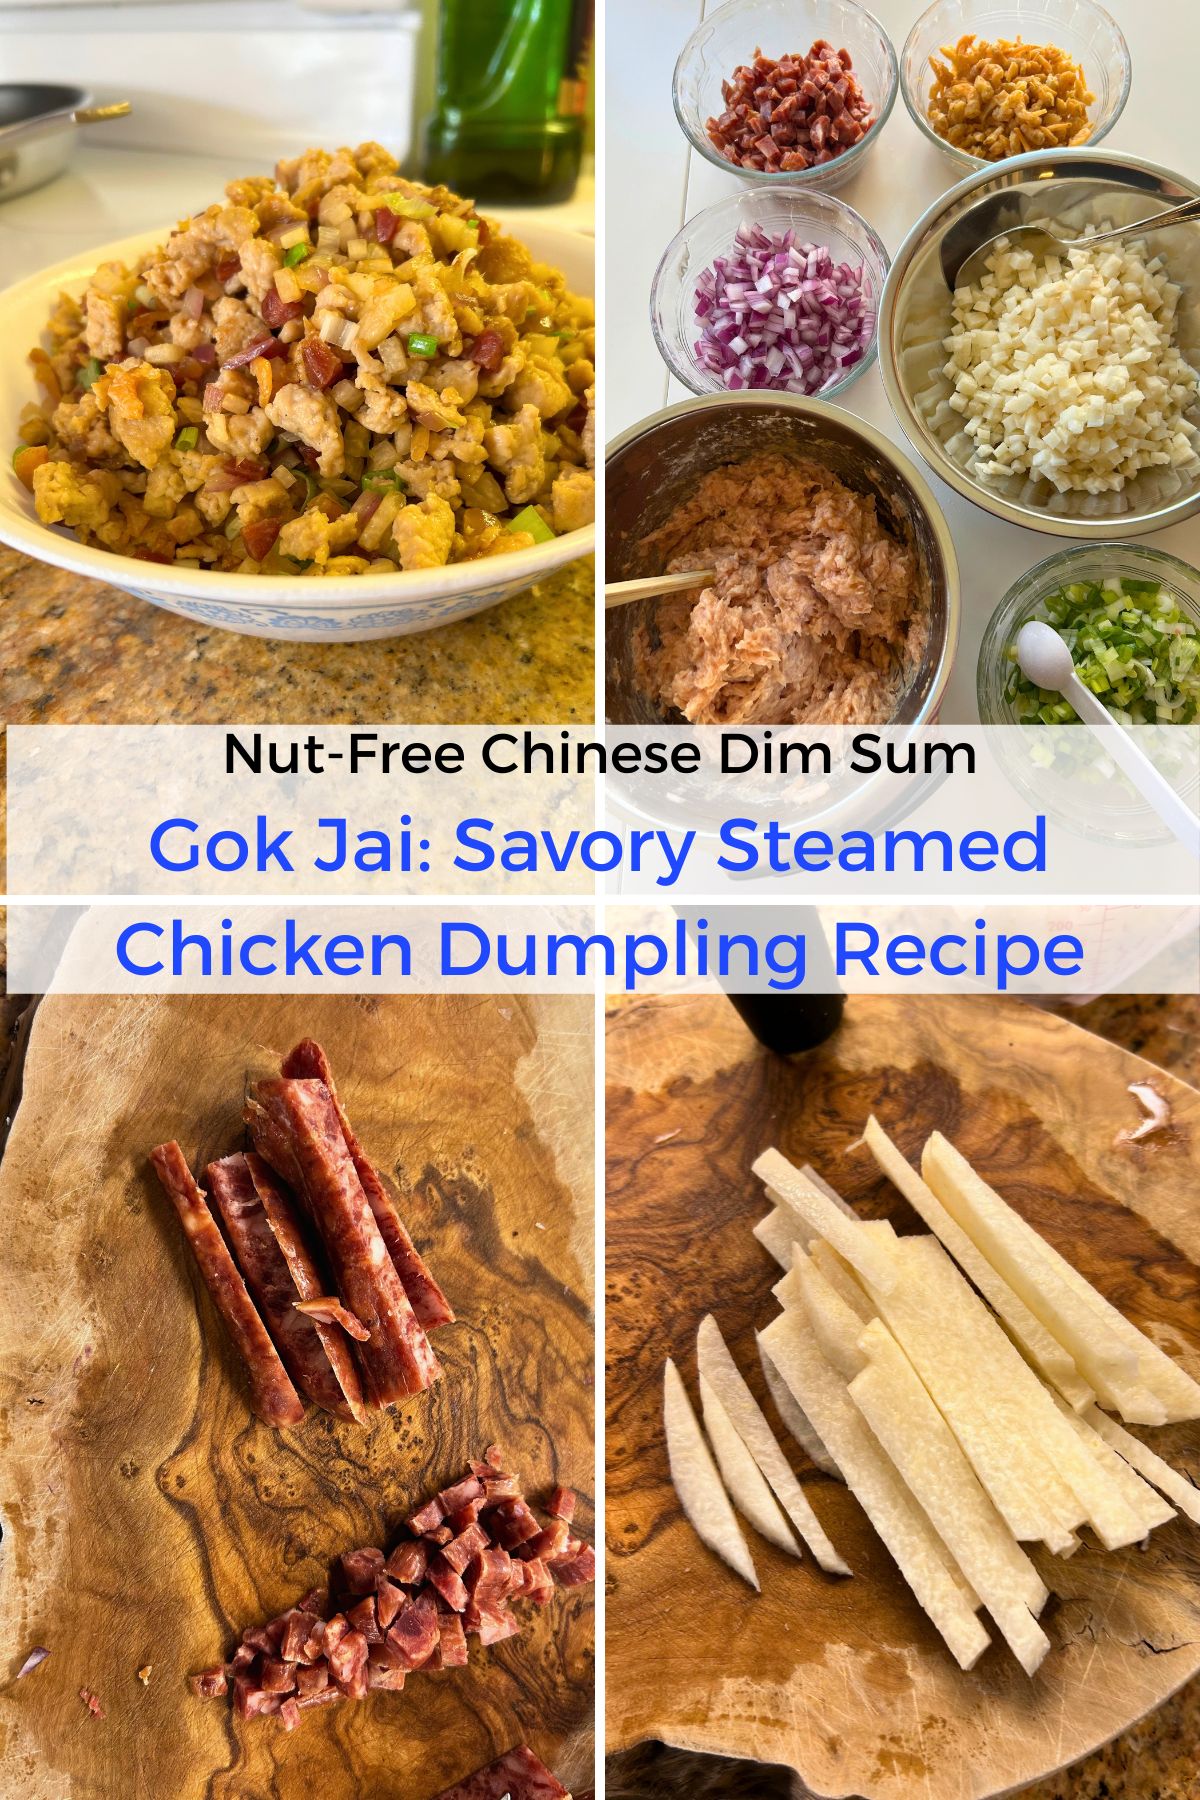
- Fine chop the sausage: cut the sausages in half lengthwise, cut each half into quarters, and then slice the sausage quarters into 1/8 inch thickness. Transfer to a medium sized bowl and set aside.
- Soak the dried shrimp: Rinse the dried shrimp in a small bowl and drain the water. Add water again and soak the dried shrimp for 2 minutes. Drain the water and set aside. If using medium or large dried shrimp, transfer the rehydrated shrimp to a cutting board and rough chop the shrimp so that they're no more than 1/4 inch in size. Transfer to the small bowl and set aside.
- Fine dice the red onion: peel the onion, trim and discard the root end. Cut the onion into 1/8 inch slices and then fine dice. Transfer to a small bowl and set aside.
- Fine dice the jicama: use a paring knife or peeler to peel the jicama and trim off any fibrous areas. Thinly slice the jicama, cut the slices into thin sticks, and then fine dice the sticks into small cubes (approximately 1/8 inch) and set aside in a medium sized bowl.
- Combine the cornstarch slurry ingredients (1 teaspoon oyster sauce, 1 teaspoon soy sauce, 2 teaspoons sesame oil, if using, 2 teaspoons cornstarch, and 2 tablespoons water) in a small bowl, set aside.
Make the Hot Wheat Starch Dough.
- At this point, turn up the heat on the kettle so that you will have boiling hot water ready.
- You will need a large heat-safe mixing bowl and a lid or dinner plate that can fit over it. Or you can use a 5-6 quart pot with a lid. Add a bag of wheat starch, 3/4 cup tapioca starch, and 1/2 teaspoon salt and use a large spoon or whisk to combine.
- Make the hot water dough: pour the boiling water into the starch while stirring at the same time. It's important to take your time to do this safely without distractions and to keep any children, pets, or vulnerable family members away. Transfer the boiling water into a glass measuring cup with a pour spot and drizzle 1 cup of hot water around the starch mixture and stir with chopsticks or a wooden spoon. Continue adding hot water, 1 cup at a time (4.5 cups total) and stirring until the starch mixture and water are combined. Use a rounded dough scraper to scrape the bowl and incorporate any dry starch at the bottom of the bowl, add 1-2 tablespoons of hot water as needed. The dough will appear rough and shaggy. Cover with a lid or a large plate for 20 minutes, or until warm to touch.
- Refill your hot water pot or kettle with water and cook on low heat until you are ready to steam the plates of assembled gok jai and need to add more hot water as necessary.
Stir-Fry the Filling Ingredients
- Stir-fry lop cheung and dried shrimp. In a large non-stick frying pan, add the chopped lop cheung into a cold pan and cook on low-medium heat for 3-4 minutes. As the pan heats up, the lop cheung will start rendering some fat, then increase the heat to medium, add the dried shrimp and stir-fry the lop cheung and shrimp (30 seconds). Push some of the mixture aside and add 1/2 teaspoon of sugar and allow the sugar to melt (30 seconds). When the sugar starts to melt, stir the sausage pieces into the melted sugar, add 1/2 teaspoon soy sauce and continue to stir fry the shrimp and lop cheung until they're evenly seasoned (30 seconds). Remove from heat and transfer to a clean large bowl, set aside.
- Stir-fry onions and jicama. In the same frying pan with medium heat, add 1 teaspoon olive oil and the diced onions (add diced mushrooms here, if using). Stir fry until the diced onions are fragrant (30 seconds). Add the diced jicama and stir fry to combine. Push some of the mixture aside and add 1/2 teaspoon of sugar and allow the sugar to start to melt (30 seconds). When the sugar starts to melt, stir the vegetables into the sugar, add 1/2 teaspoon soy sauce and stir-fry to combine until everything is seasoned and the jicama looks cooked (1-2 minutes). Remove from heat and transfer to the bowl with the sausage and shrimp, set aside.
- Stir-fry the ground chicken. In the same frying pan with medium heat, add 1 teaspoon olive oil and the ground chicken. Spread the chicken mixture out to brown and use a spatula to break up the chicken into pea-sized pieces until not pink and cooked through (5 to 7 minutes).
- Combine all the filling ingredients and add the cornstarch slurry. Return the already stir-fried lop cheung, dried shrimp, jicama and onions back into the pan, briefly stir-fry for 1 minute until hot. Stir the cornstarch slurry until it's smooth, then pour it into the pan then stir fry to combine until the sauce thickens and turn off the heat.
- Check that the filling is seasoned to taste: At this point, I check that the filling is seasoned to my liking (it usually is). For example you can add a little more white pepper, more sesame oil if using, oyster sauce for more umami and/or sweetness, or the smallest amount of soy sauce. Once seasoned to your liking, add the chopped scallions and stir to combine and transfer the filling mixture back into the large bowl.
Dumpling Assembly and Steaming Instructions
- Final preparations before assembling dumplings. If you have a tortilla press, line both sides of it with parchment paper (I secure parchment paper on the top side with a chip clip or clothespin). Otherwise you can use parchment paper and a rolling pin, set aside. Brush 4 pie plates or cake pans with a little bit of oil or coat with non-stick spray, set aside. Check that your steamer has enough hot water, cook on low heat until you have your first plate of assembled dumplings.
- Precautions for handling the hot water dough. After allowing the hot water dough to rest in a heat-safe covered bowl or pot for 20 minutes or so, pinch it with your finger tips to check that it's not too hot to knead. If you have a digital thermometer you can check and if it's hotter than 110°F, cover up the dough and wait 5 more minutes and check again. I recommend wearing food-safe prep gloves because if the dough is too hot to knead, you can easily take the gloves off instead of having hot dough stuck to your hand. When in doubt, I wear a nitrile gloves over a kitchen glove to protect my hand, I usually can tolerate the heat this way. Don't wait too long (up to 40 minutes) because the dough is easier to handle while still warm and it's best to keep it covered so dough doesn't dry out and crack.
- Knead the dough. When you decide that the dough has cooled down enough to handle, pour 2 tablespoons of oil over the hot water dough and knead the dough until it is smooth and no longer lumpy. As you knead, break up any white lumps of starch by squeezing them between your thumb and fingers. When the dough is smooth, roughly divide the dough into 4 quarters, take out one quarter, and cover the bowl.
- Divide the quarter into dough balls. Work on a clean cutting board and lightly dust with tapioca starch or cornstarch. Knead the dough a few times so that the dough is smooth and not too sticky. Roll the dough into a 1-inch thick log and cut into approximately 12 to 15 1-inch pieces. Each piece should weigh approximately 25 grams. If you don't have a small scale, try to be consistent (like the size of a cherry tomato). Roll each piece into a ball, place them on one of your pie plates or on the plate that's covering the bowl of dough. If you're working by yourself, keep the dough balls covered with a sheet of parchment paper or plastic wrap so they don't dry out.
- Flatten a ball into a 3.5 inch circle, about 1/8-inch thick with a tortilla press or rolling pin. If you don't have either, press the dough ball with the heel of your palm into a cookie shape, then hold it in both hands and start pinching and flattening it out from the center into a circle (flat or cup shaped).
- Fill the dough circle. Hold the dough circle in your slightly cupped hand and add a tablespoon of filling. Tap the filling down, add a tiny more if there's space or take a little bit out if it seems overfilled. Allow at least 1/2-inch margin around the edge so that there's room to pinch the edges of the wrapper together.
- To seal the dumpling wrapper, you're already holding the wrapper and filling like a taco in your cupped hand. Pinch the tops of the circle together and then keep pinching down each side to seal the dumpling.
- To add the decorative rope edge, start from one end of the dumpling edge, use the side of your thumb to press the edge down diagonally and pinch. Move your thumb slightly over and pinch again until the dumpling looks like an empanada. Place the filled and sealed dumpling upright in your lightly oiled pie plate. Repeat the filling and sealing process until you fill a pie plate with gok jai.
- Check the steamer pot: When your plate is almost full, bring your steamer pot to a full boil on medium heat. Check that the level of water reaches your steamer rack (at least 1-inch high) and add more hot water as needed. Be sure you have extra water in a pot or a kettle to add to the steamer pot in between batches of gok jai.
- Steam the dumplings: Place about 12-14 gok jai per plate, arrange the dumplings so that they're slightly staggered and not too crowded so that the wrapper cooks thoroughly. Carefully place the plate of dumplings on top of the steamer rack and cover with the lid. Steam each plate of dumplings for 15 minutes, set a timer.
- When the dumplings are done steaming after 15 minutes, carefully lift the lid so that the condensation drips back into the pot and not into the plate of dumplings (quickly lift the lid and aim the edge of your lid in between the outside edge of the plate and the pot). The dumplings are ready when the wrappers look slightly translucent (you can see the filling inside). Use a plate lifter (or other heat protective gloves) to take the pie plate out and then refill the steamer pot with hot water up to the height of the steamer rack. Add the next plate of gok jai to steam for 15 minutes and repeat until all the gok jai dumplings are steamed.
- The gok jai are ready to serve and eat as-is, while hot and steamy. If you prefer, you can lightly dip them with typical dim sum sauces such as soy sauce and/or chili oil but I recommend trying them plain to savor all the subtle flavors and textures.
Notes
Nutrition
Related Recipes
I love dim sum, to understand why I love dim sum, there’s Dim Sum for Everyone, a children’s book by Grace Lin that I adore. If you wanted to enjoy a dim sum style meal, you might make some other dishes to accompany the gok jai, although it would be challenging to make everything in one day.
I have a bunch of rice noodle roll recipes. You can mix and match the different rice noodle roll recipes, filling, and steaming methods as you wish. These recipes are best enjoyed freshly made.
- Rice noodle rolls with beef is my first from scratch recipe on the blog.
- Rice noodle rolls with shrimp is a recipe from a NYC dim sum restaurant using a little bit of potato starch that I collect from making latkes and other potato recipes.
- Rice noodle rolls with dried shrimp and Chinese sausage uses my noodle recipe but steamed in a big giant electric skillet to make a lot at the same time.
- Rice noodle rolls with char siu (BBQ pork) and steamed with a perforated pizza pan.
You might also like some savory bao recipes, which you can make in advance and reheat before serving.
- Steamed char siu bao (BBQ pork) recipe – this recipe is easy because the dough is no-knead!
- Baked char siu bao (BBQ pork) recipe
- Dai Gai Bao (big chicken and pork) recipe
Some other dim sum inspired dishes include Turnip Cake which is a savory rice cake that’s pan-fried until crispy, Steamed Spare Ribs with Black Bean Sauce. And we might order a dessert like “Ma Lai Go” Chinese Sponge Cake or Po Tat (Macau-Style Portuguese Custard Tart).
When we go out to a dim sum restaurant for brunch, we not only order the small bites, but we also might order porridge like Century-Eggs-and-Pork-Porridge, or a noodle soup such as Wonton Mein (Wonton Noodle Soup) to share family style.
Thanks for reading, please help Nut Free Wok!
If you like this post or recipe, please be sure to give a 5 star rating, leave a comment, and share this post! Your support means a lot to me.
Subscribe to Nut Free Wok’s email subscription (be sure to respond to the confirmation email). You will be notified by email next time I publish another post or recipe and I won’t send you spam or share your email address with anyone.
Disclosure/Disclaimer:
I may mention the names of stores and/or brand names of products that I use because readers ask and I share products and sources which I use and think may be helpful to readers, all opinions are my own. Please note that manufacturing practices and ingredients can change at anytime without notice and readers are always responsible for assuring allergen safety before buying or consuming foods. NutFreeWok.com is a participant in the Amazon Services LLC Associates Program, an affiliate advertising program designed to provide a means for sites to earn advertising fees by advertising and linking to Amazon.com. Thank you for reading!